Fitting Bearings and Insulators
Fitting Bearings and Insulators
Insulators are usually made from a lamination of elephantide and polyester. They are available commercially for a range of the more common bearings and, in most cases, a choice of thicknesses. Occasionally it is necessary to make your own.
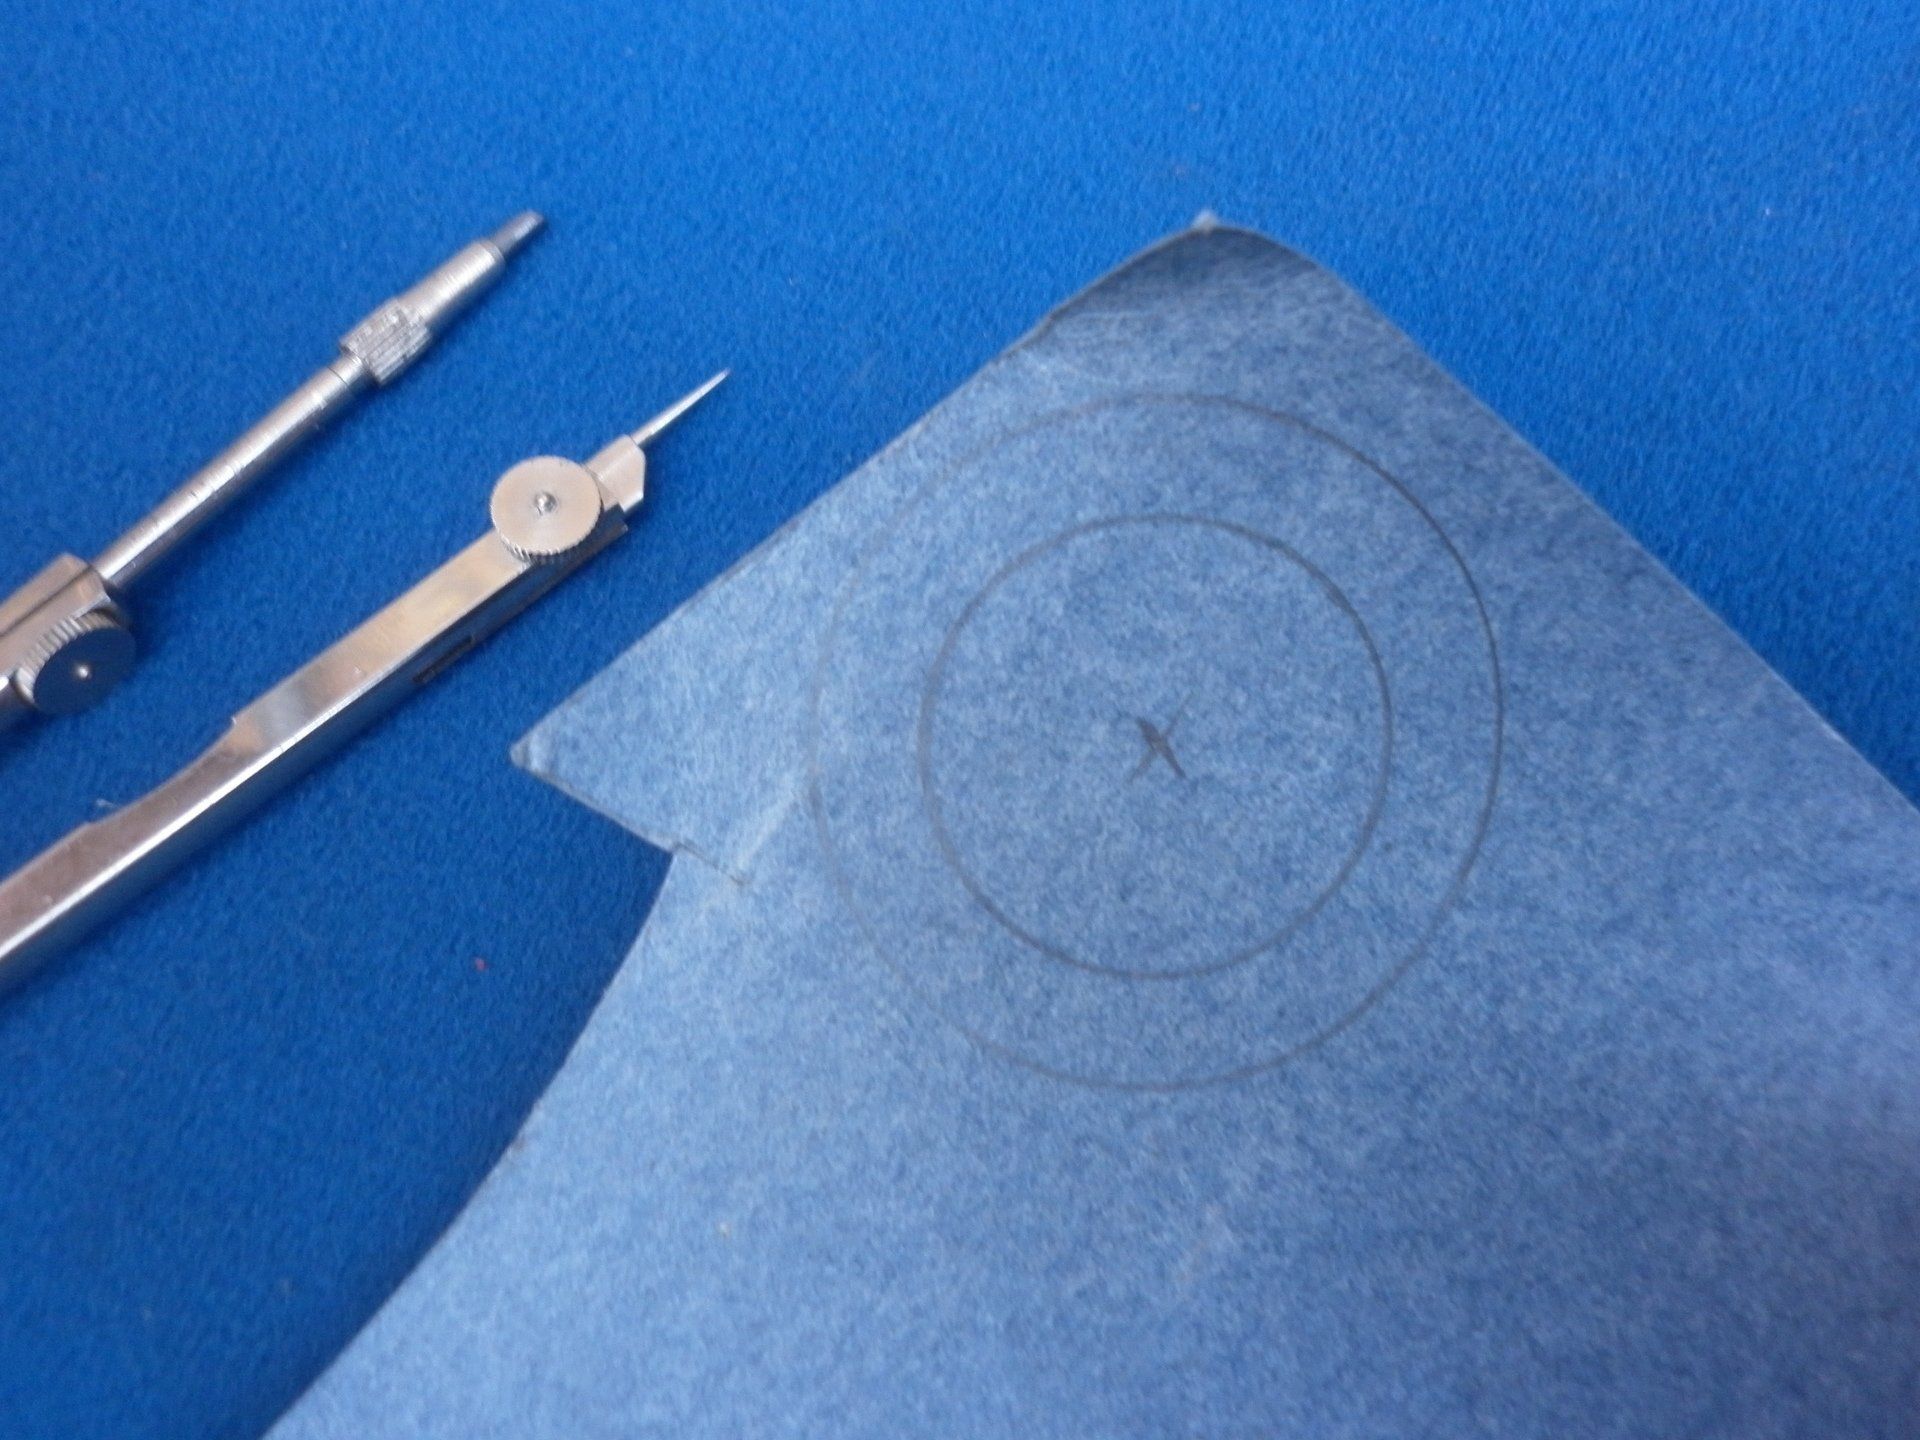
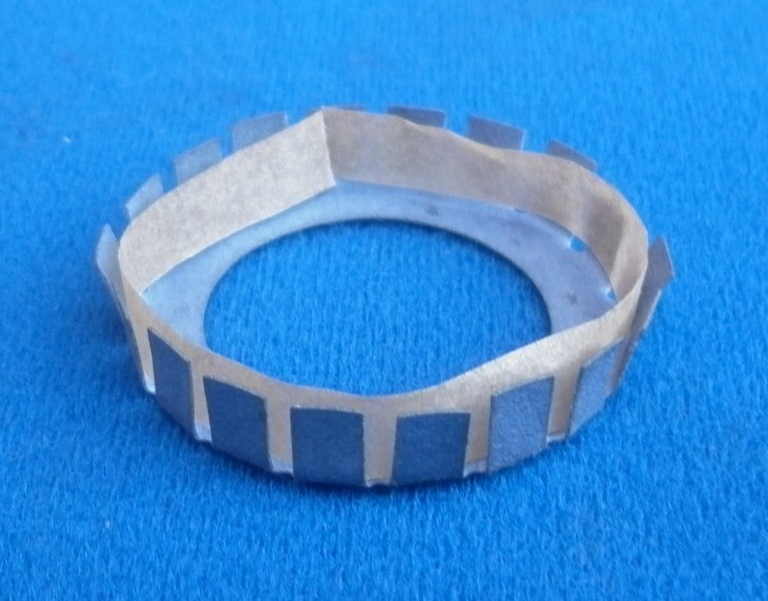
First step is to use a compass to draw a couple of concentric circles on the elephantide. The inner circle is the same diameter as the outer race of the bearing. The outer circle is larger by twice the thickness of the bearing.
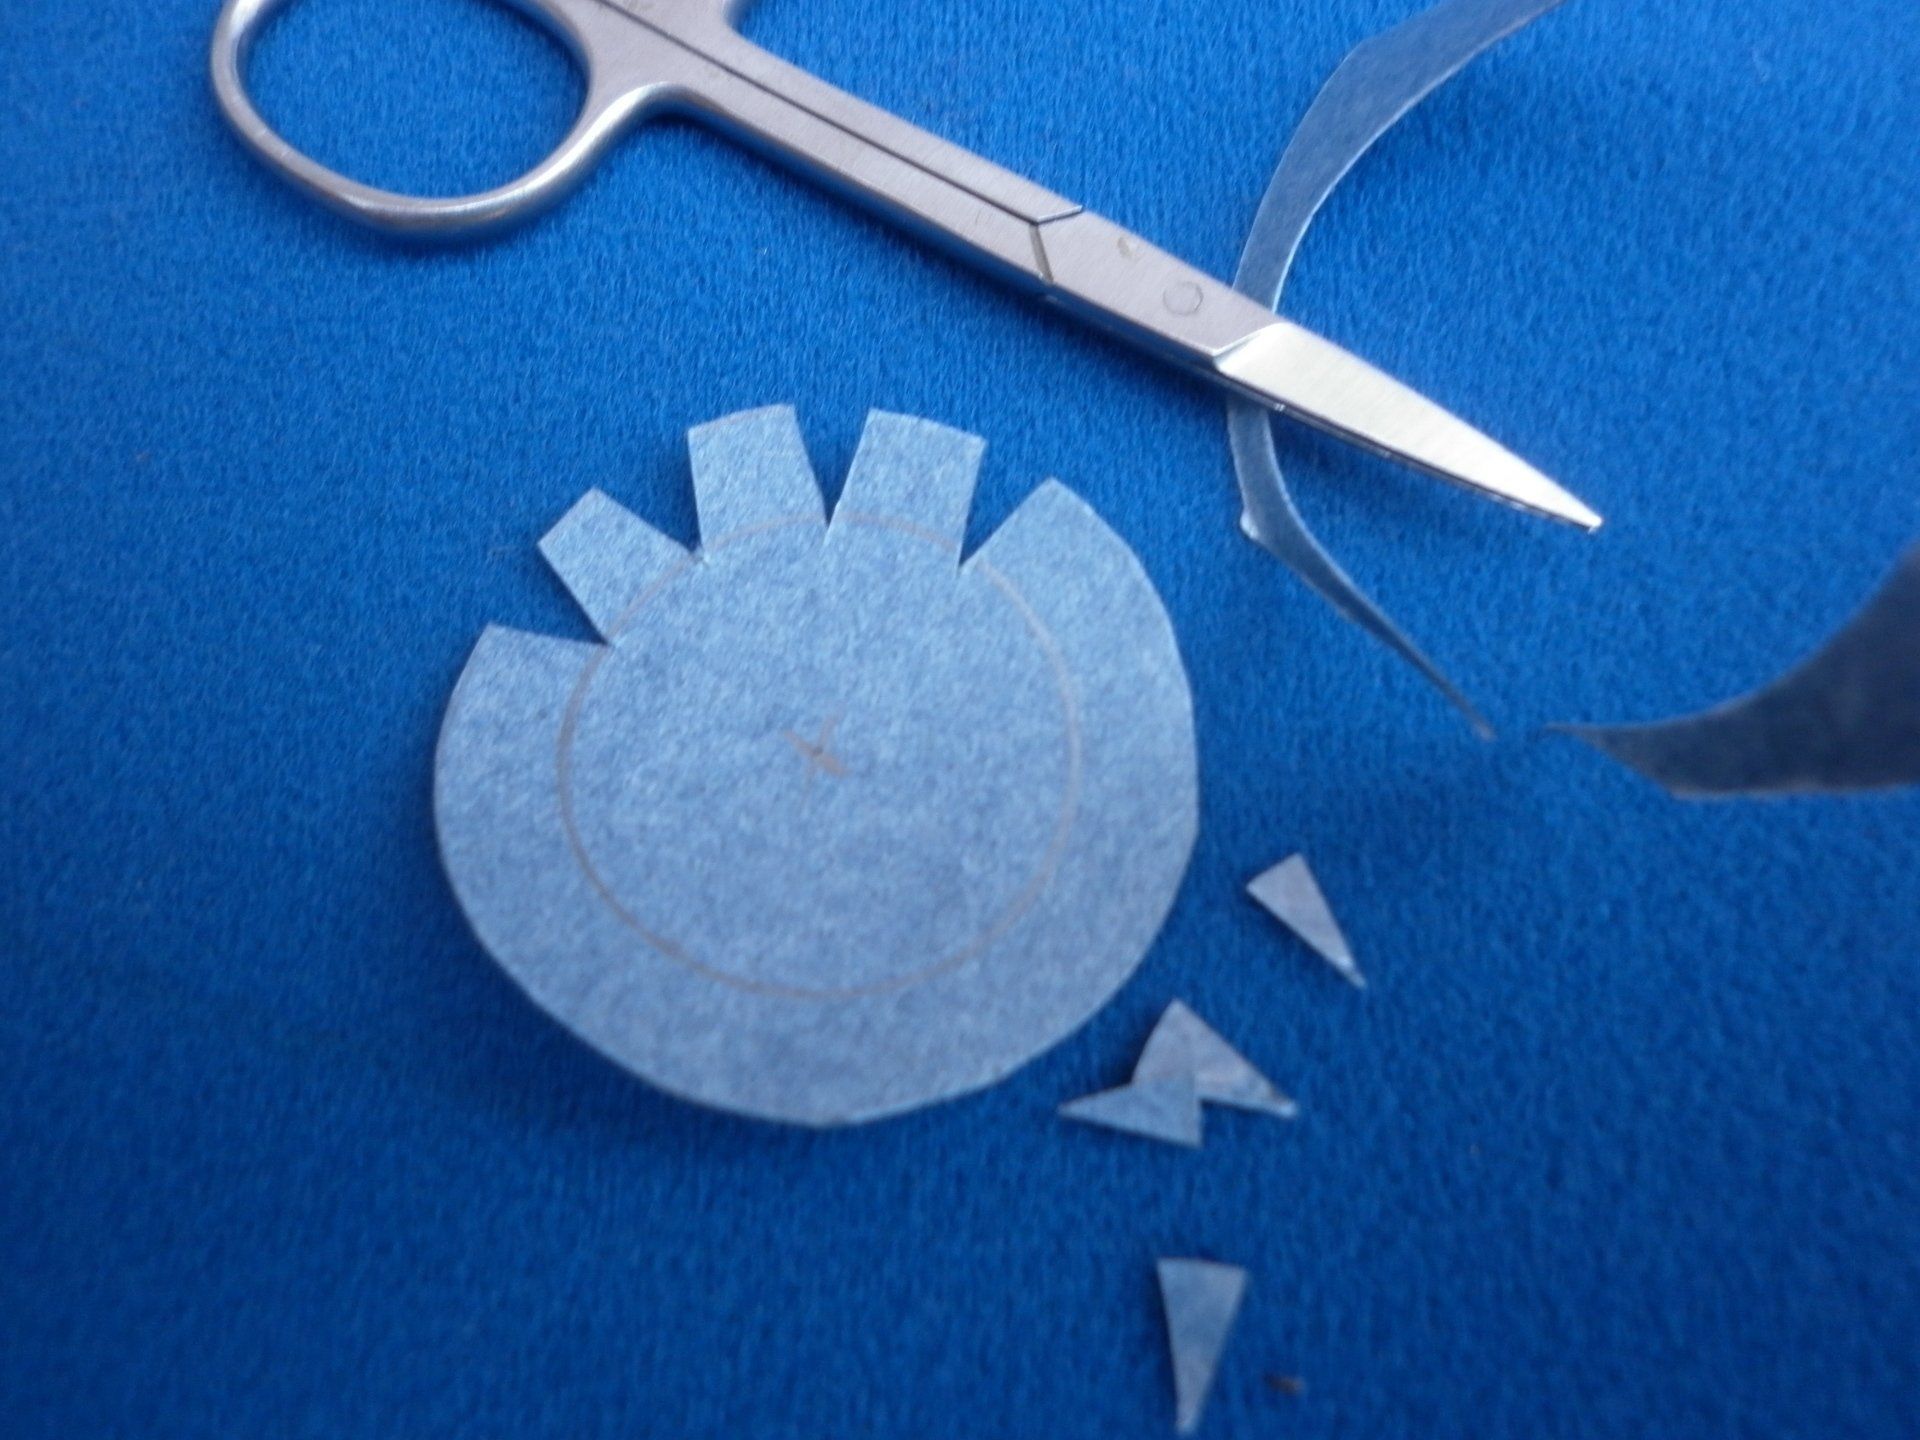
Use a pair of scissors to trim around the outer circle and then cut triangular segments as shown. Note that the point of each triangle should be just inside the inner circle.
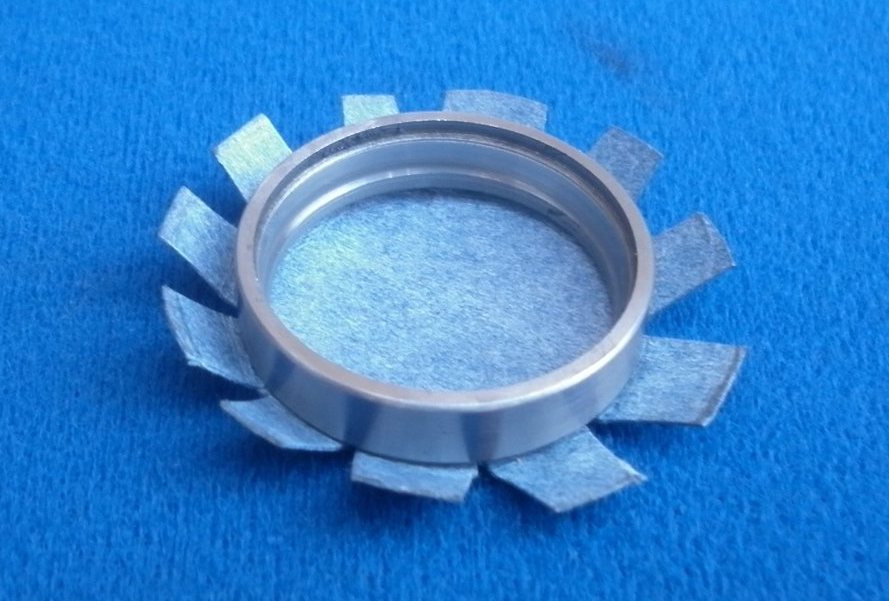
Fold the tabs up around the outside of the bearing race. It is important that tabs do not overlap. If they do, trim the sides of the triangles a little more.
It will be necessary to cut a hole in the centre of the insulator to allow the armature shaft through. It can be done at this stage but, particularly for the smaller bearings, it is sometimes worth leaving this until later. The insulator will be stronger if left with a solid centre and so will be less likely to tear as the bearing is pressed into place.
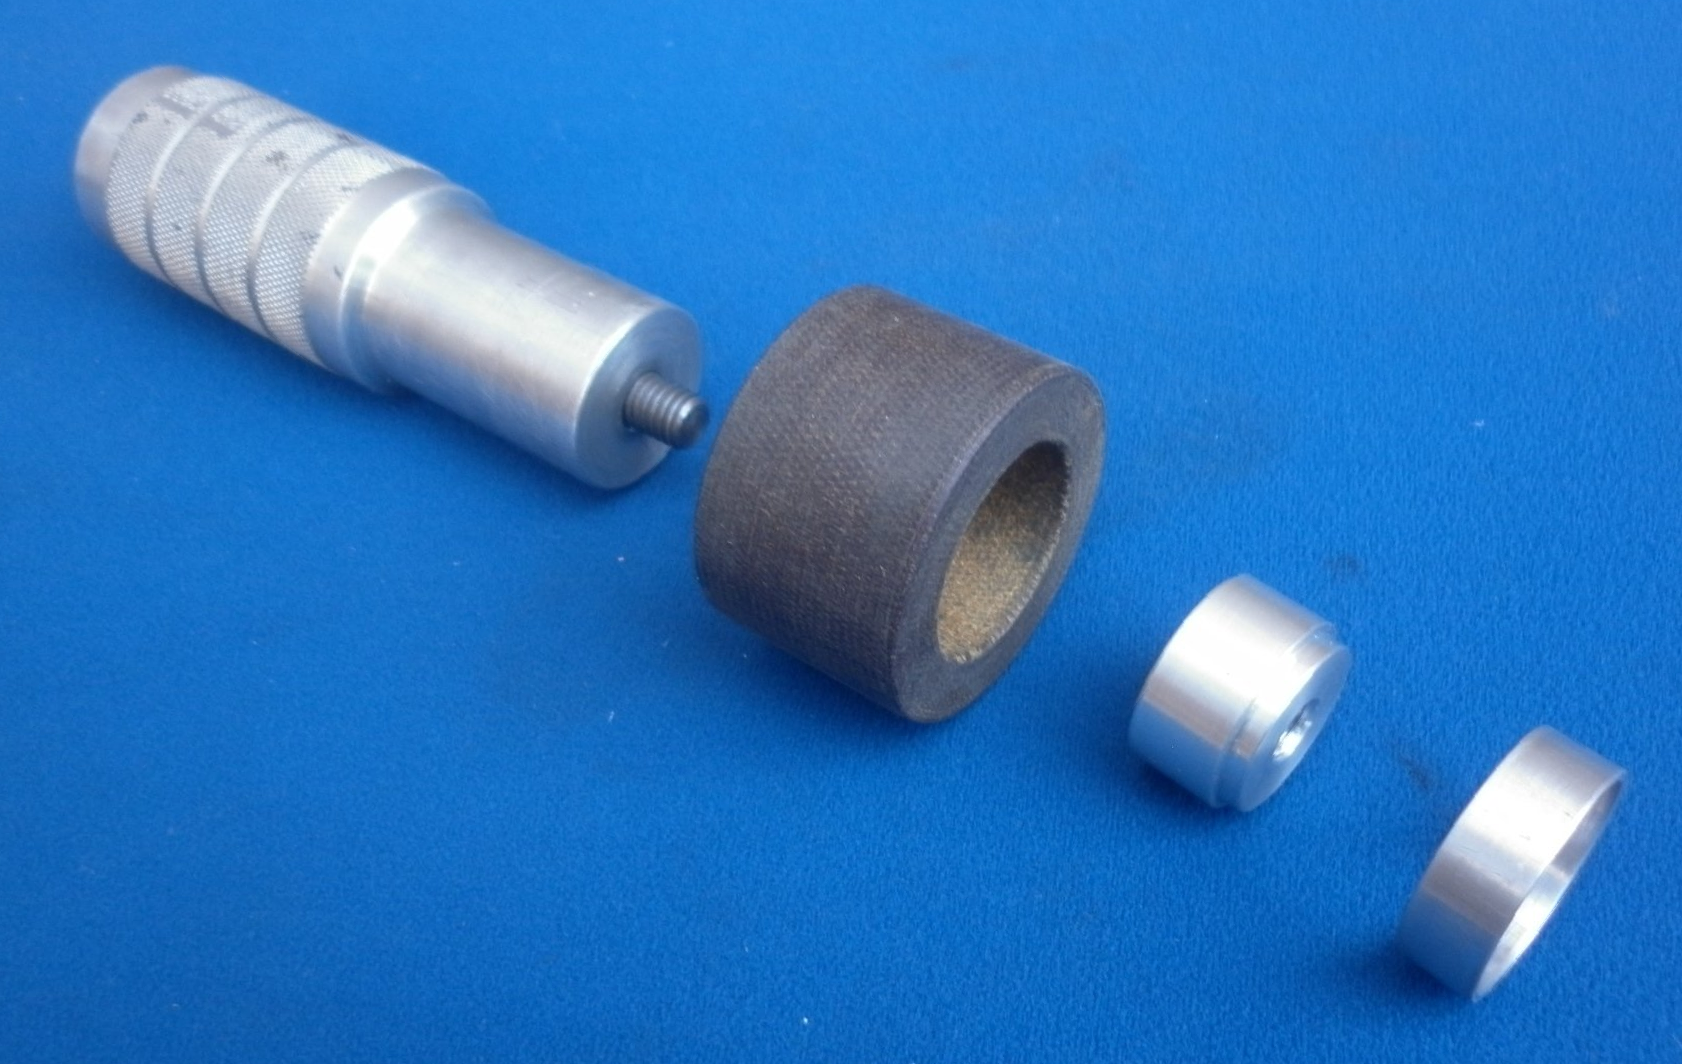
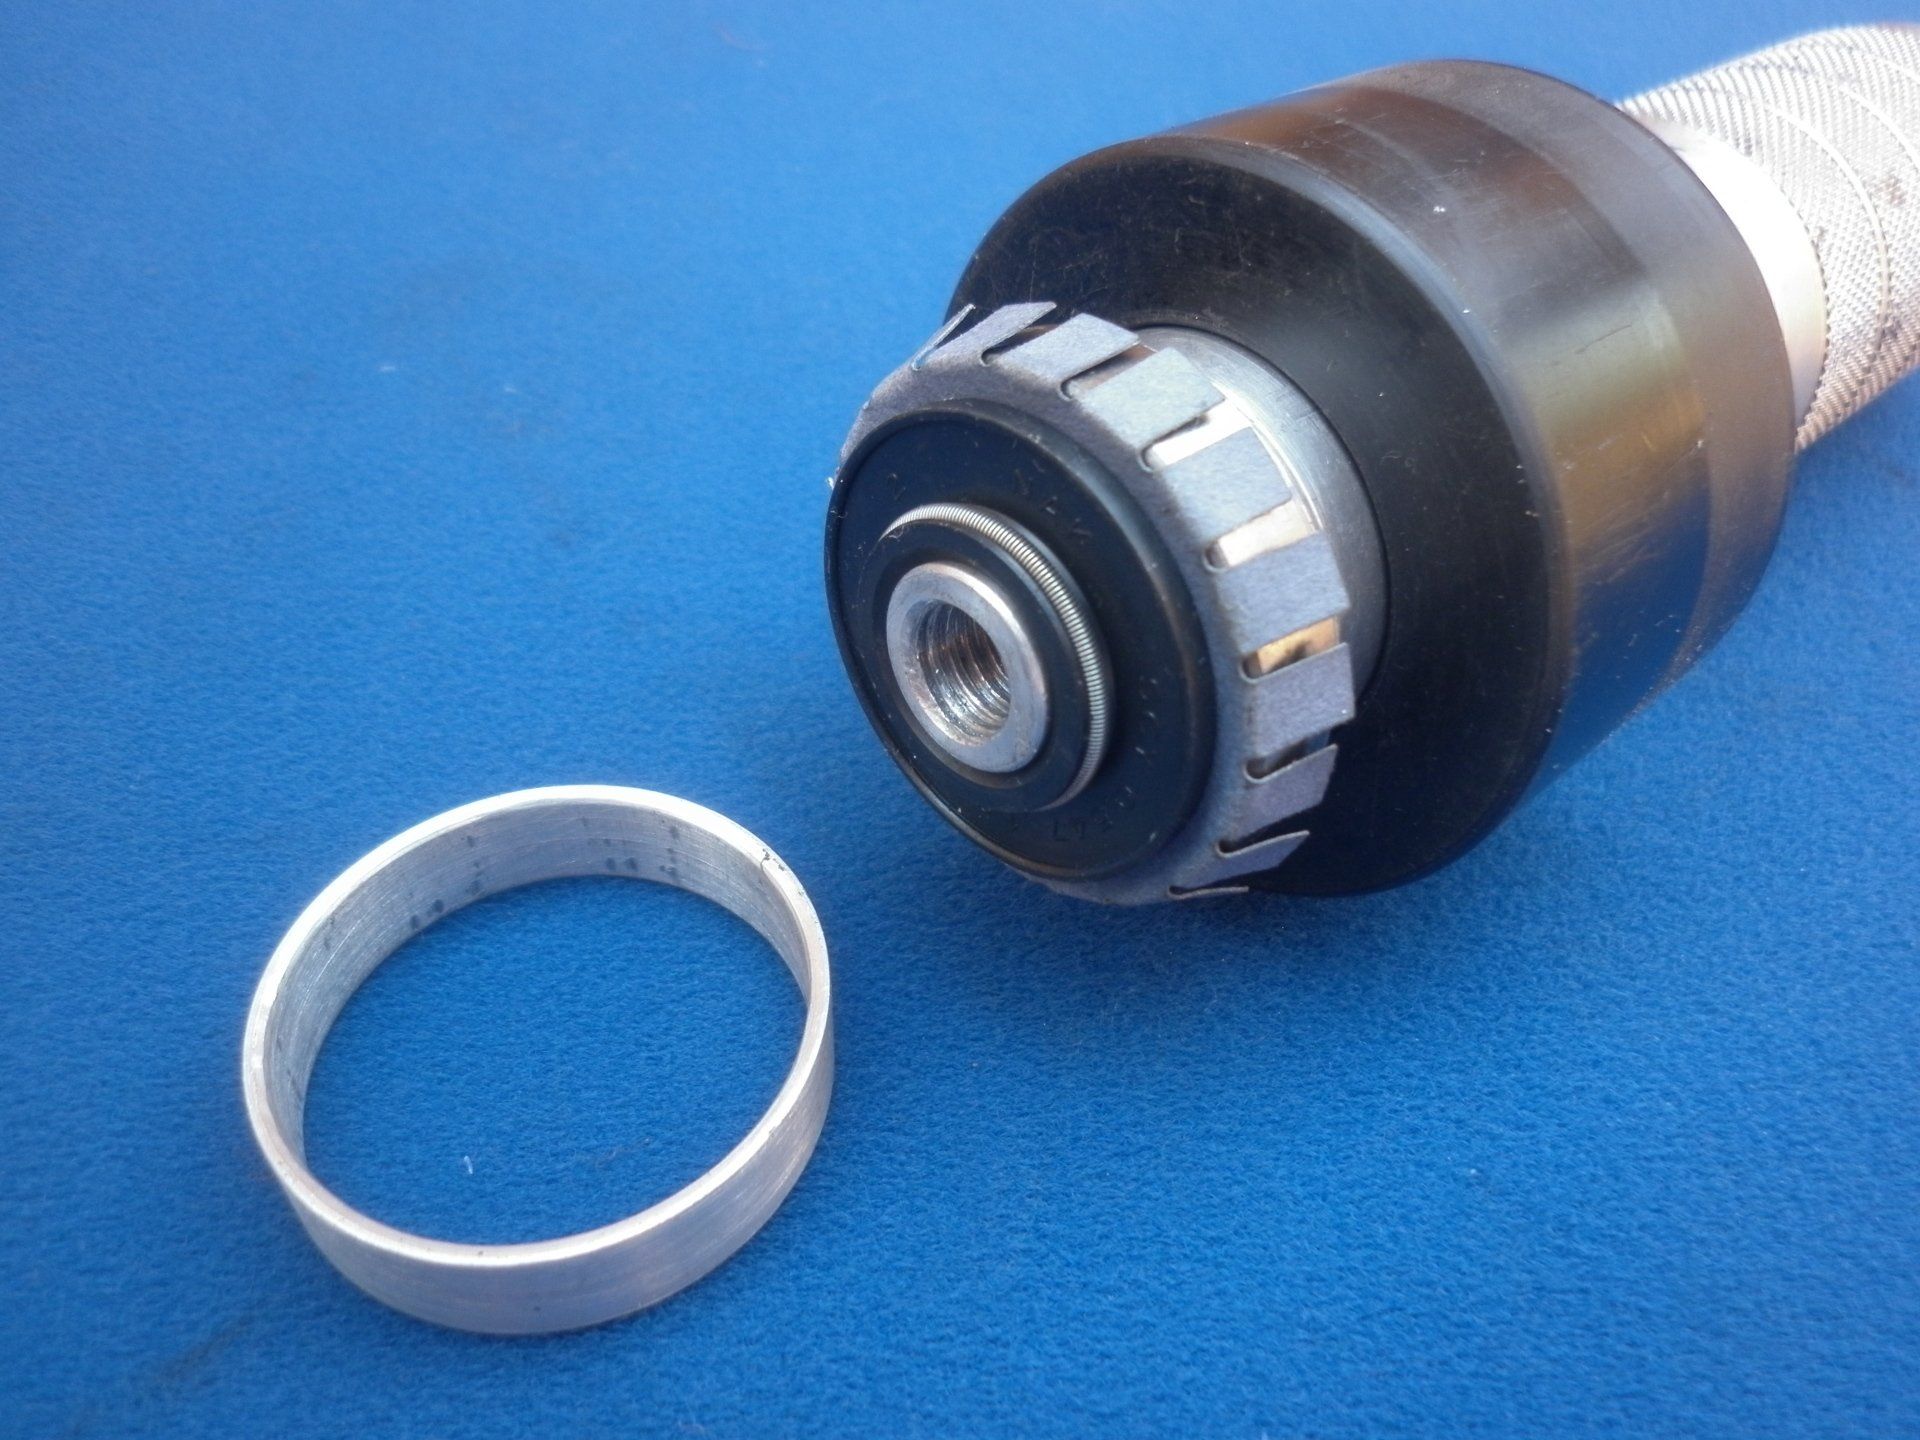
Fitting a bearing and insulator can be a fiddly job, especially if it is being fitted at the end of the armature tunnel in the main body of the magneto. It is not made any easier if the body has integral magnets as they will attract the bearing race! The Magneto Guys use a specially made mandrel to make the job easier. It is made up of four component parts as follows. From left to right:
- Universal mandrel - used for all bearing sizes and magneto bodies.
- Body sleeve - bored to allow sliding fit on the universal mandrel, outside diameter is a sliding fit in the magneto body.
- Bearing boss - screws onto the universal mandrel. Outside diameter slightly smaller than the o/d of the bearing race. The front end is reduced in diameter to suit the i/d of the bearing race.
- Insulator sleeve - bored to allow a sliding fit over the bearing outer race and insulator.
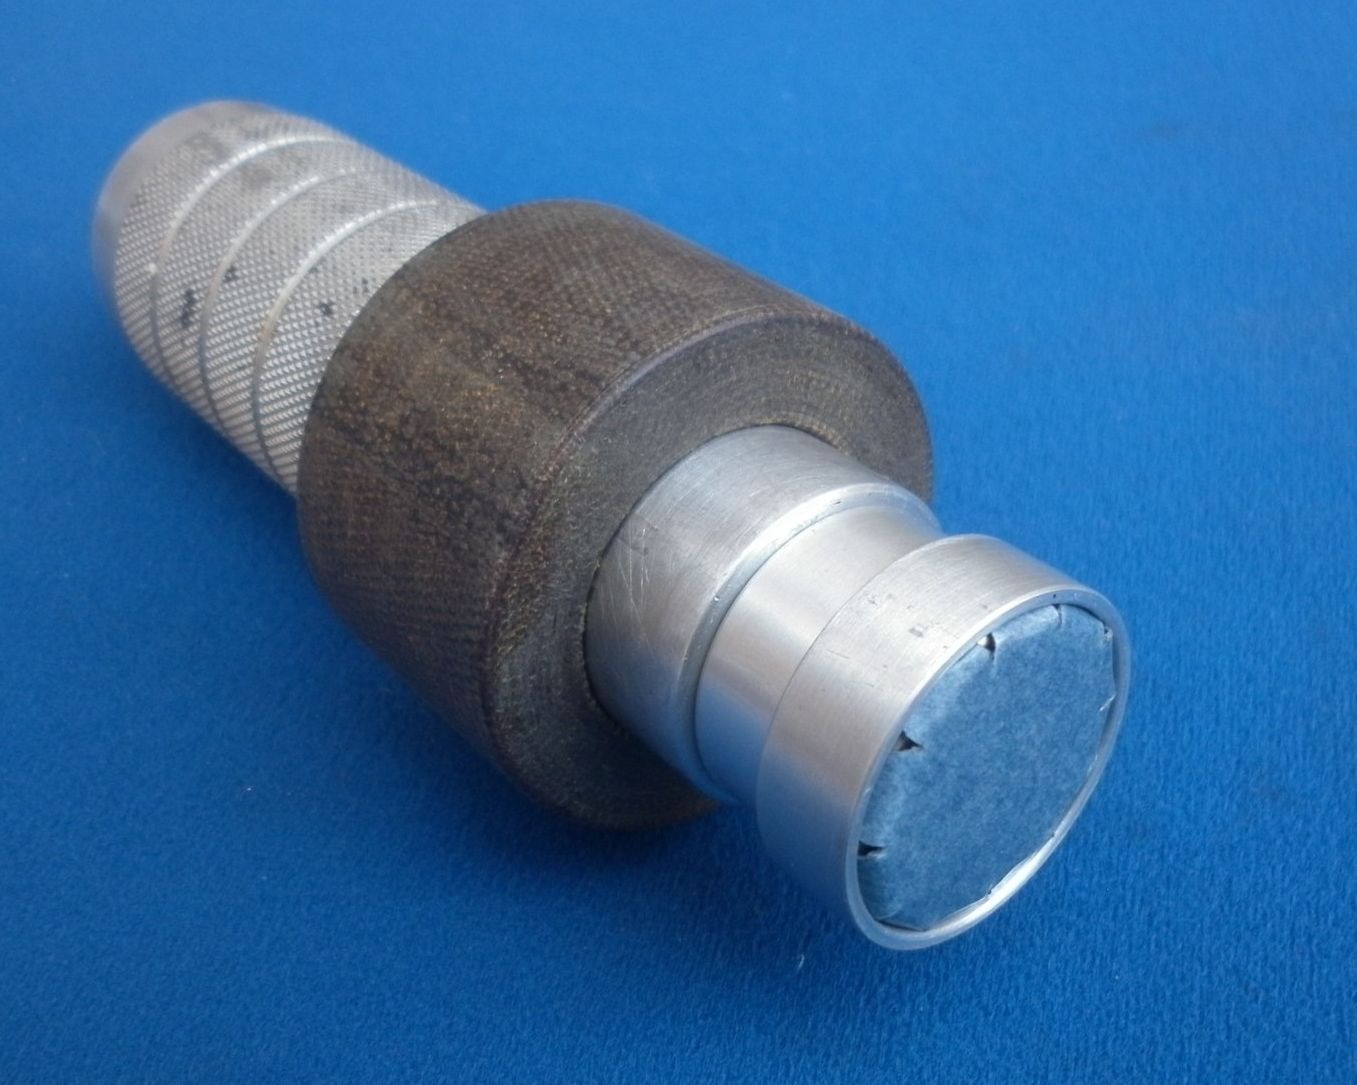
This second picture shows the mandrel assembled with the bearing and insulator in place.
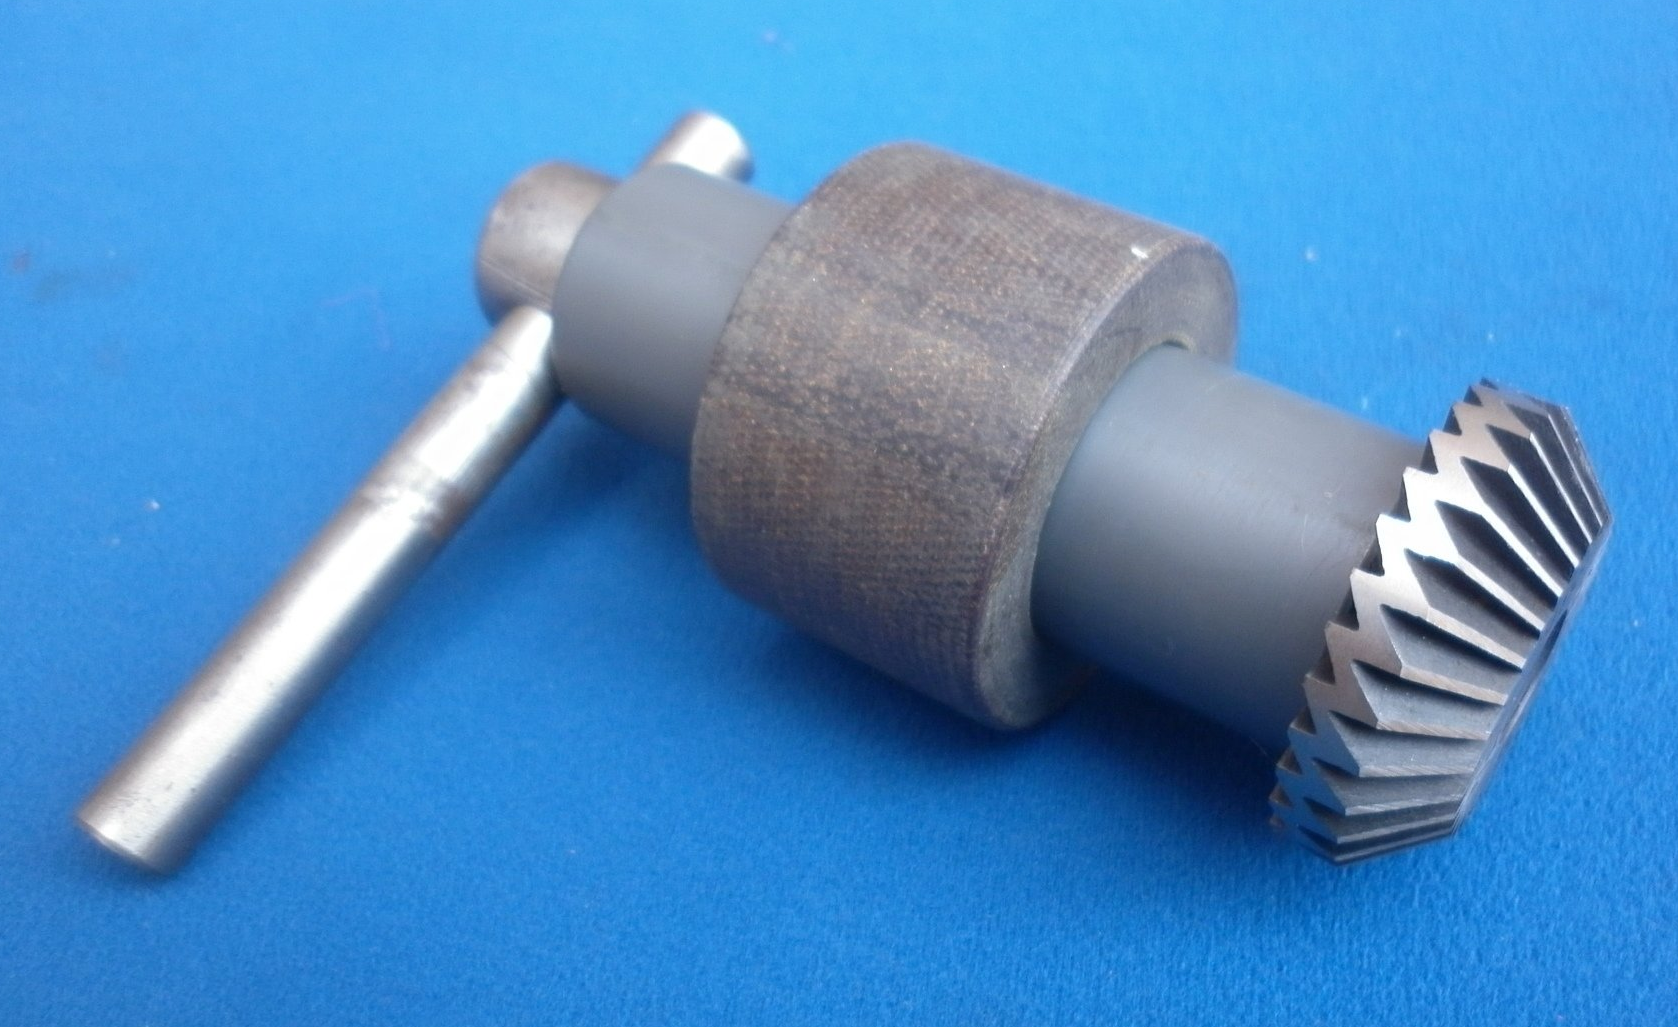
If the bearing housing in the magneto body has a sharp corner on the entry, it is a good idea to make a slight chamfer so that the bearing and insulator can be pressed in with less likelihood of tearing the insulator. The Magneto Guys have made this tool to do the job. Note that the same body sleeve is used to keep the cutter running concentrically. The cutter is one normally used for cutting valve seats.
The magneto body needs to be warmed up to allow it to expand so that the mandrel can be more easily used to press the bearing and insulator into place. This can be done by placing the body in an oven for half an hour at 100 degrees C. Normally the mandrel is pushed into place with the help of a press and, as it does so, the insulator sleeve slides up onto the bearing boss. When using a press, a gentle slow squeeze is best, a sudden jerky movement is likely to tear the insulator.
If the bearing falls into place too easily, it is likely that the insulator has been made from material which is too thin. A narrow strip of kraft paper placed between the bearing race and the insulator can be used to increase the overall diameter thereby producing a tighter fit.
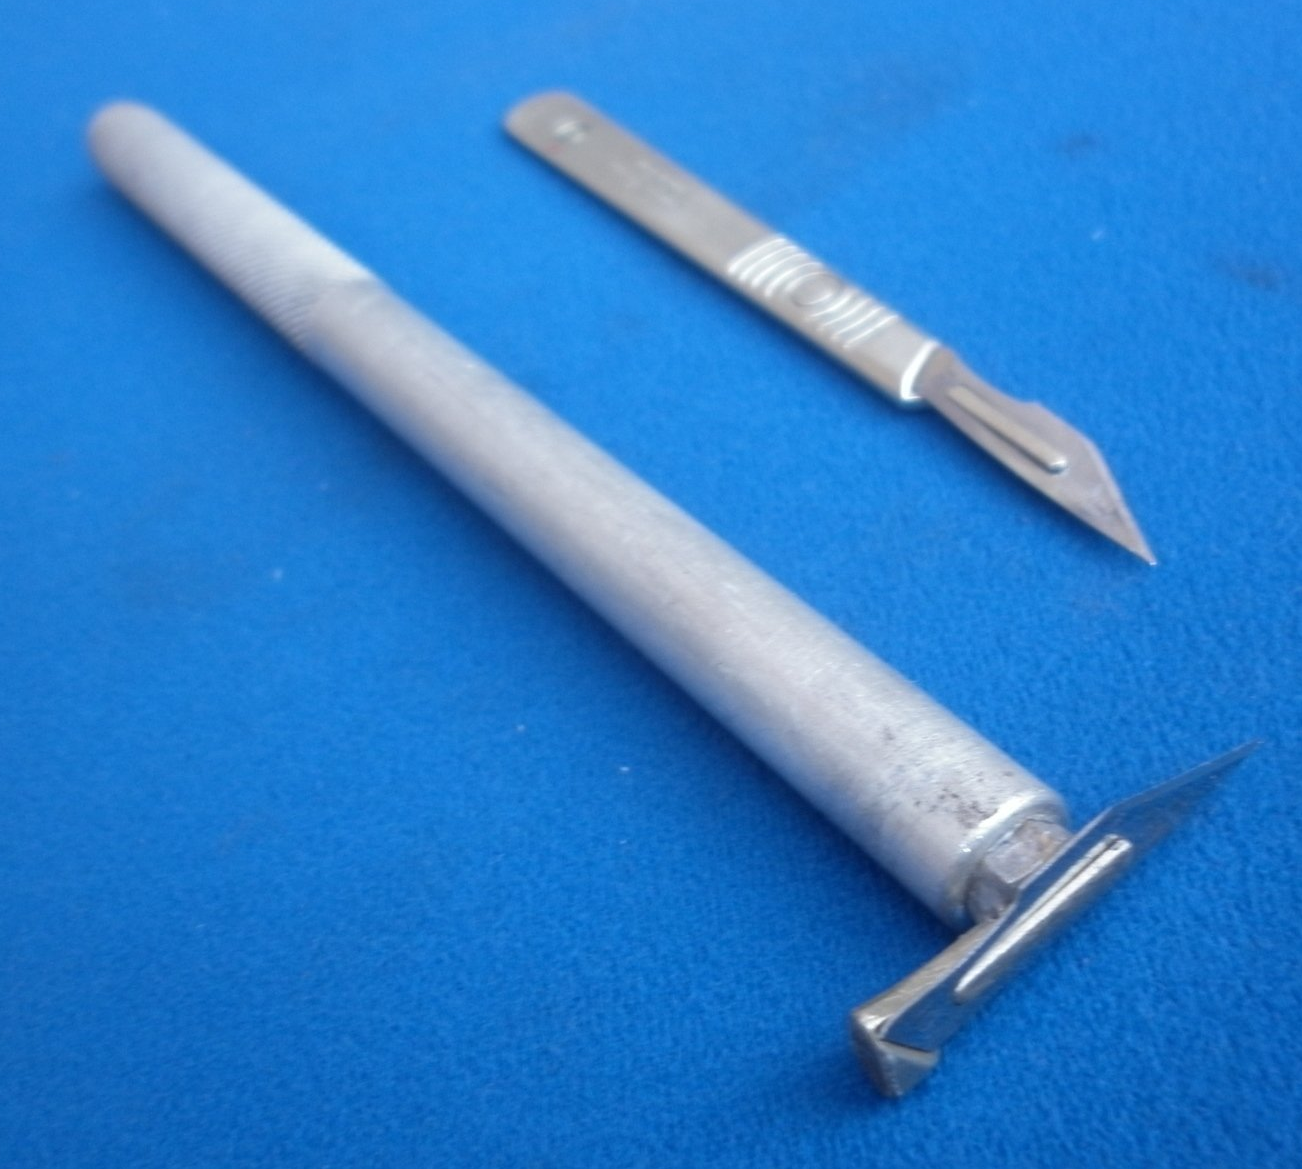
Once the bearing and insulator is in place, the centre of the insulator can be cut out if it has not already been done. This is best done using a scalpel. The picture also shows a specially modified scalpel which can be used at the bottom of the armature tunnel.
Some makes and models of magneto incorporate an oil seal in the design to keep oil out of the magneto. The oil seal is located in front of the bearing and insulator. A specially machined bearing boss can be used to hold the bearing outer race, the insulator and the oil seal as shown here. All three components can then be installed together using the procedure detailed above.
Once the bearing is in place, check that the insulator is working correctly by using a multimeter to check that there is no continuity between the bearing outer race and the magneto body.