Araldite Repairs
Araldite Repairs
Araldite comes in many different forms but we use the Araldite Standard epoxy resin adhesive which comes in two tubes - one resin and one hardener. It dries a yellowy white colour but can be coloured by adding a quick squirt of paint from an aerosol can during the mixing stage.
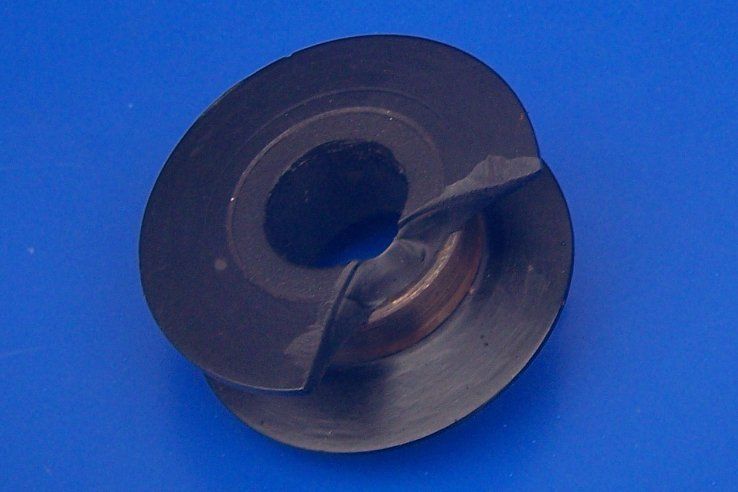
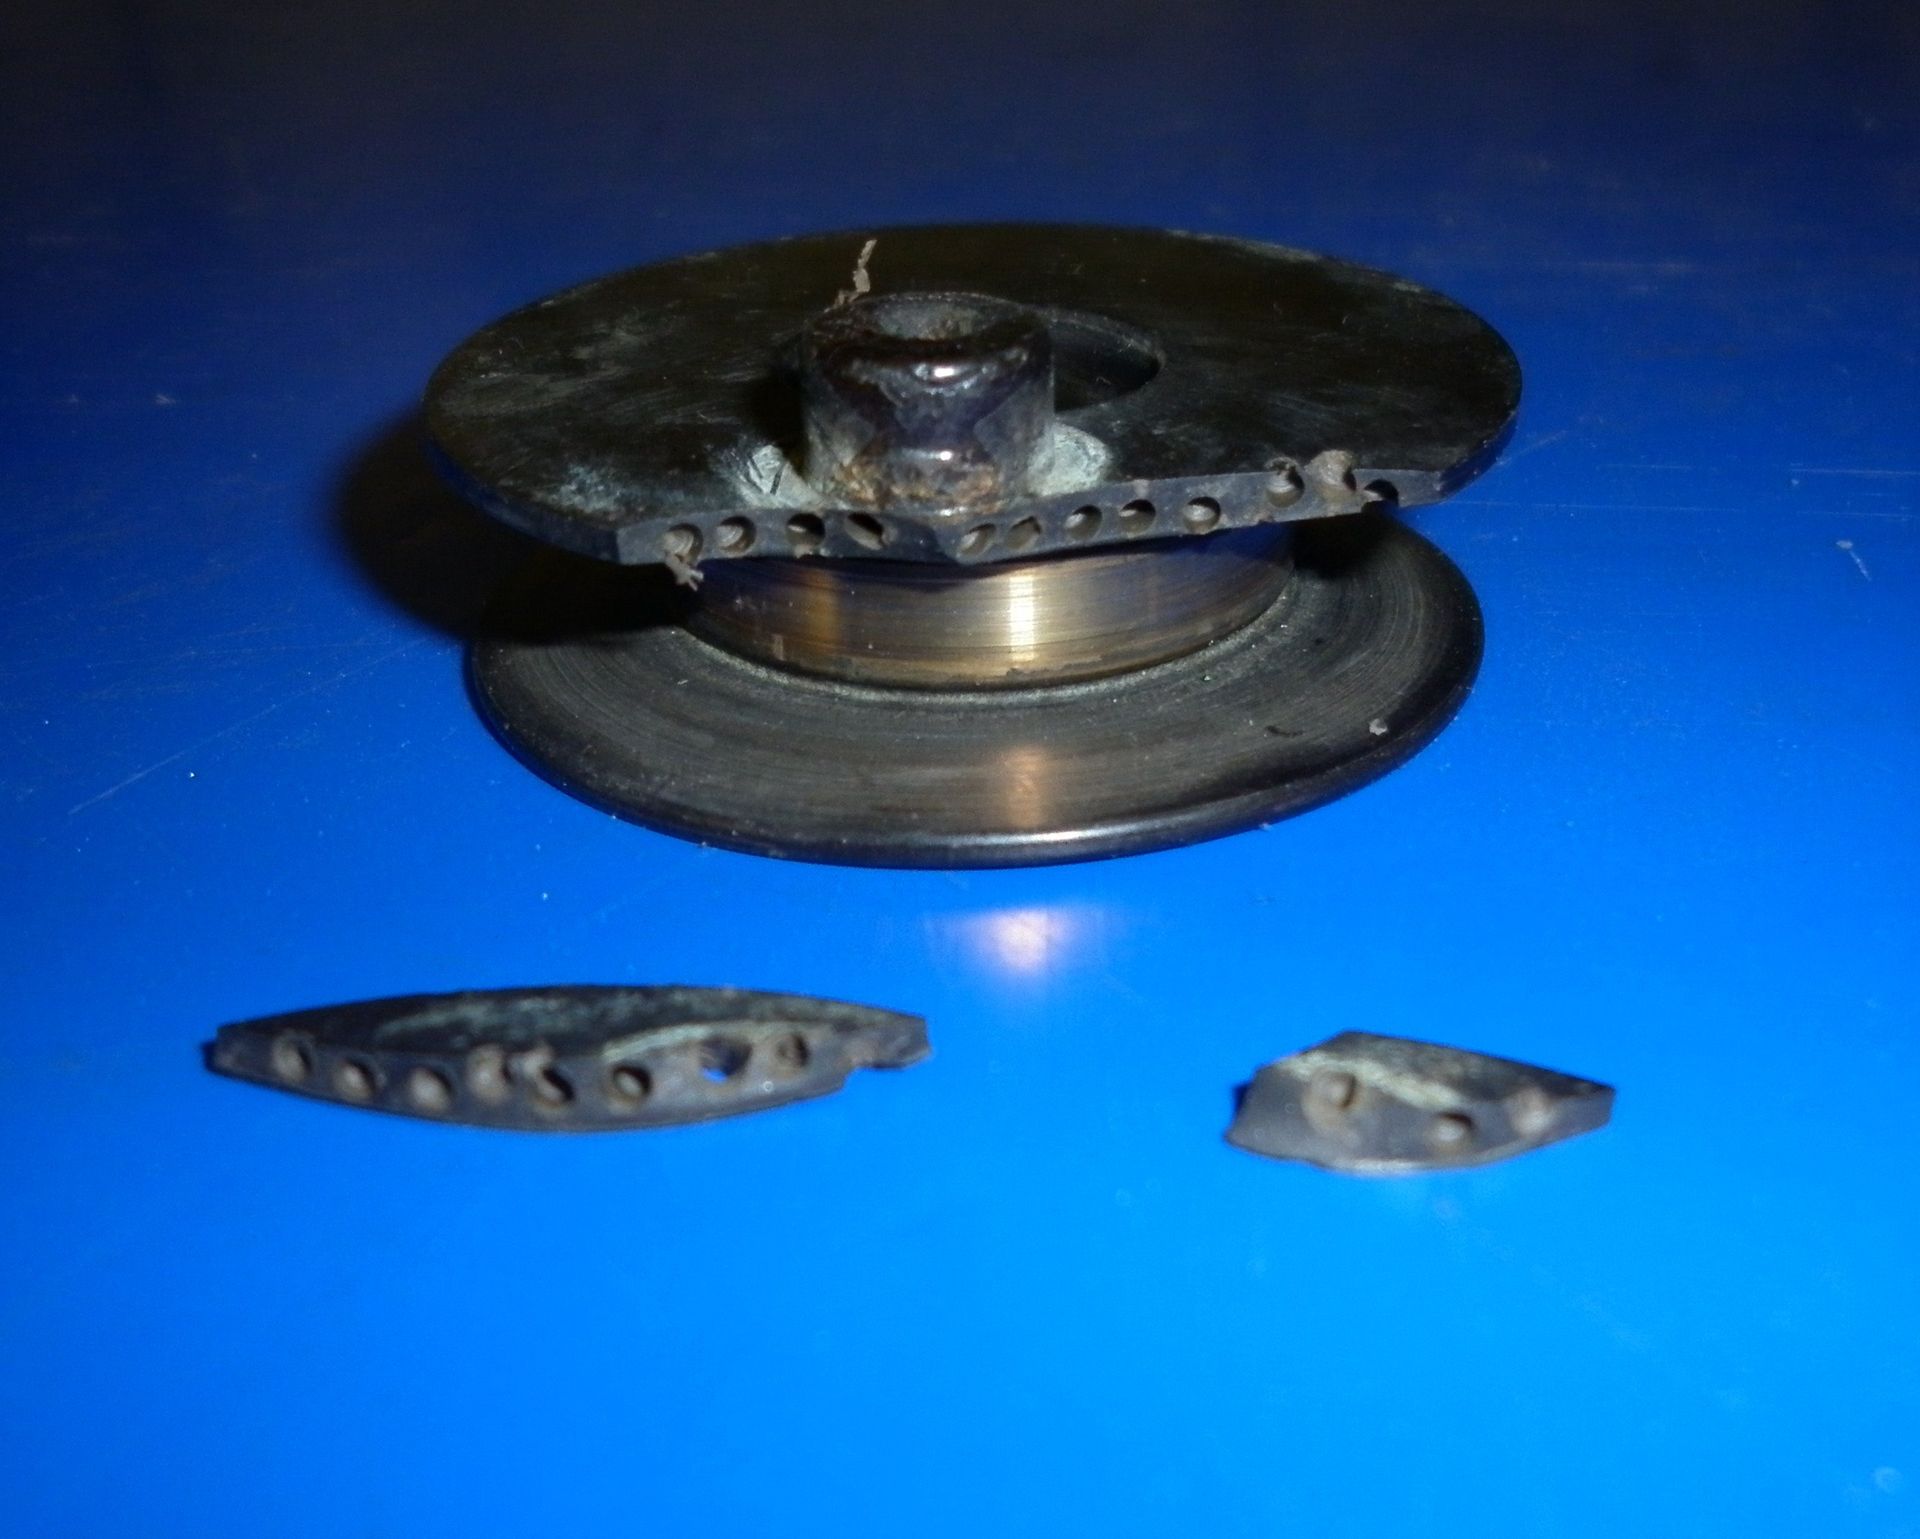
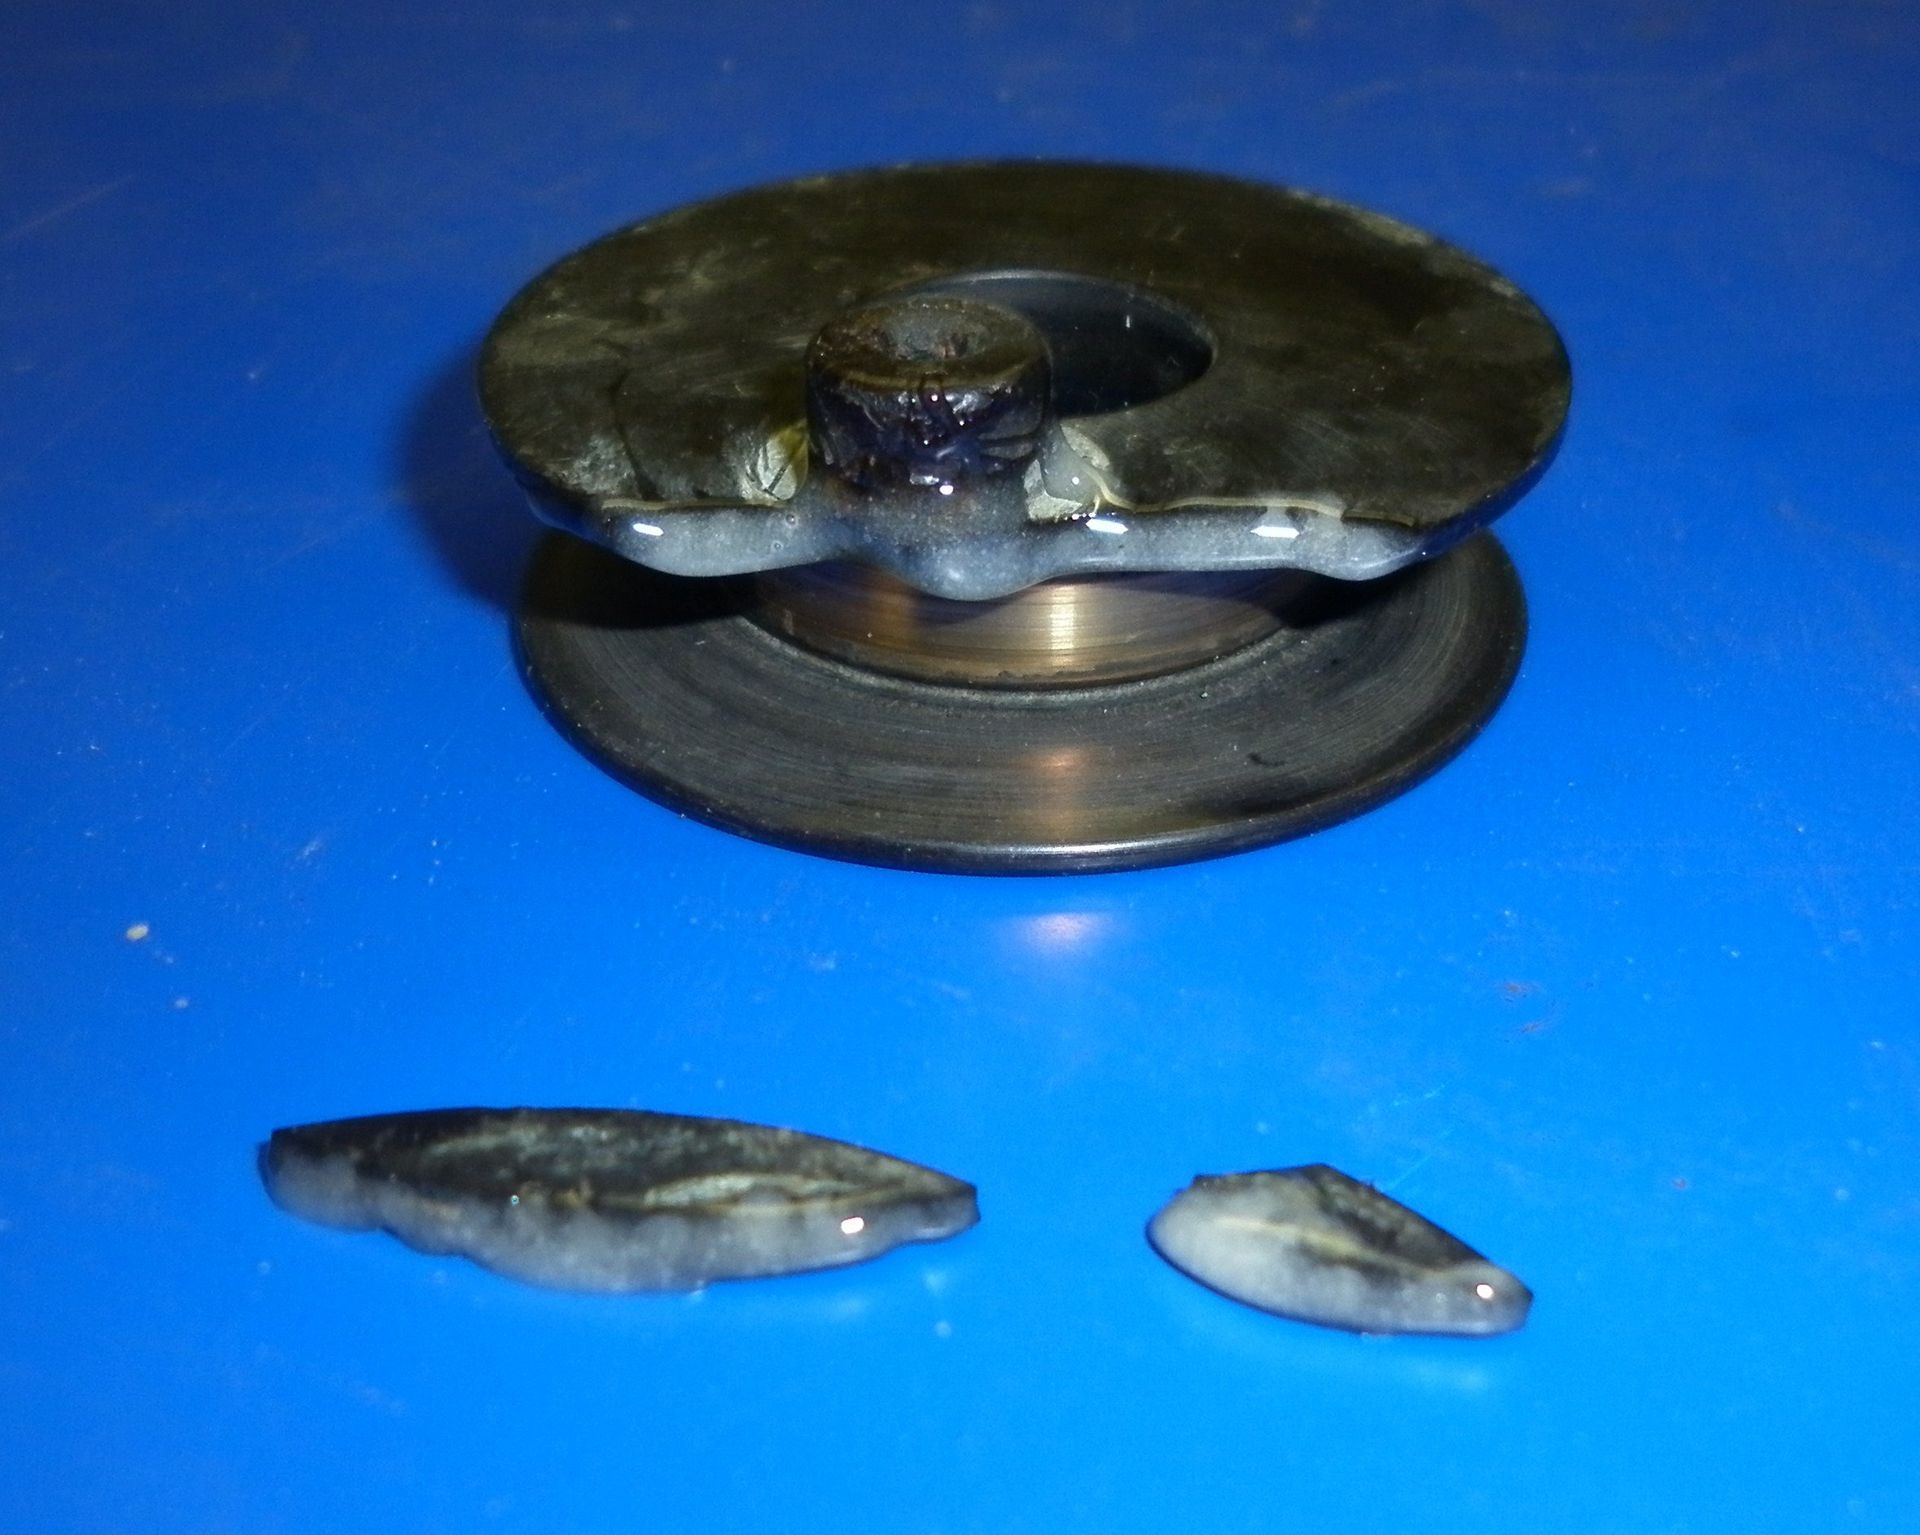
A broken slip ring is a very common problem. New reproduction slip rings are available for some of the more common magnetos and in these cases, we would obviously fit a new one. For the more obscure magnetos, there is no choice other than to manufacture a new new one from scratch or in some cases it is possible to repair the broken slip ring as shown here.
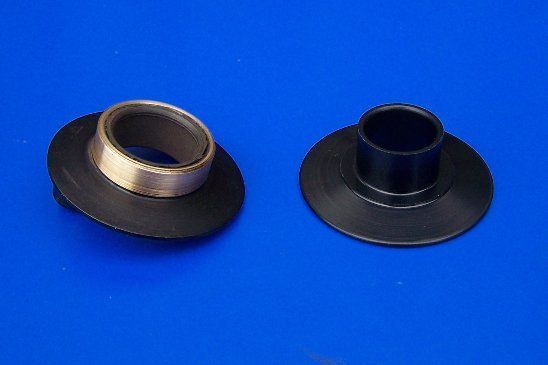
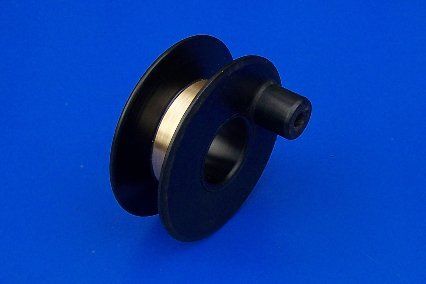
We completely removed the damaged side and enlarged the bore size at the same time. Then a new side was machined with a sleeve to return the bore back to the original size. We knew this repair would work because Bosch used to make them this way! (see the Slip Rings page in the Technical section)
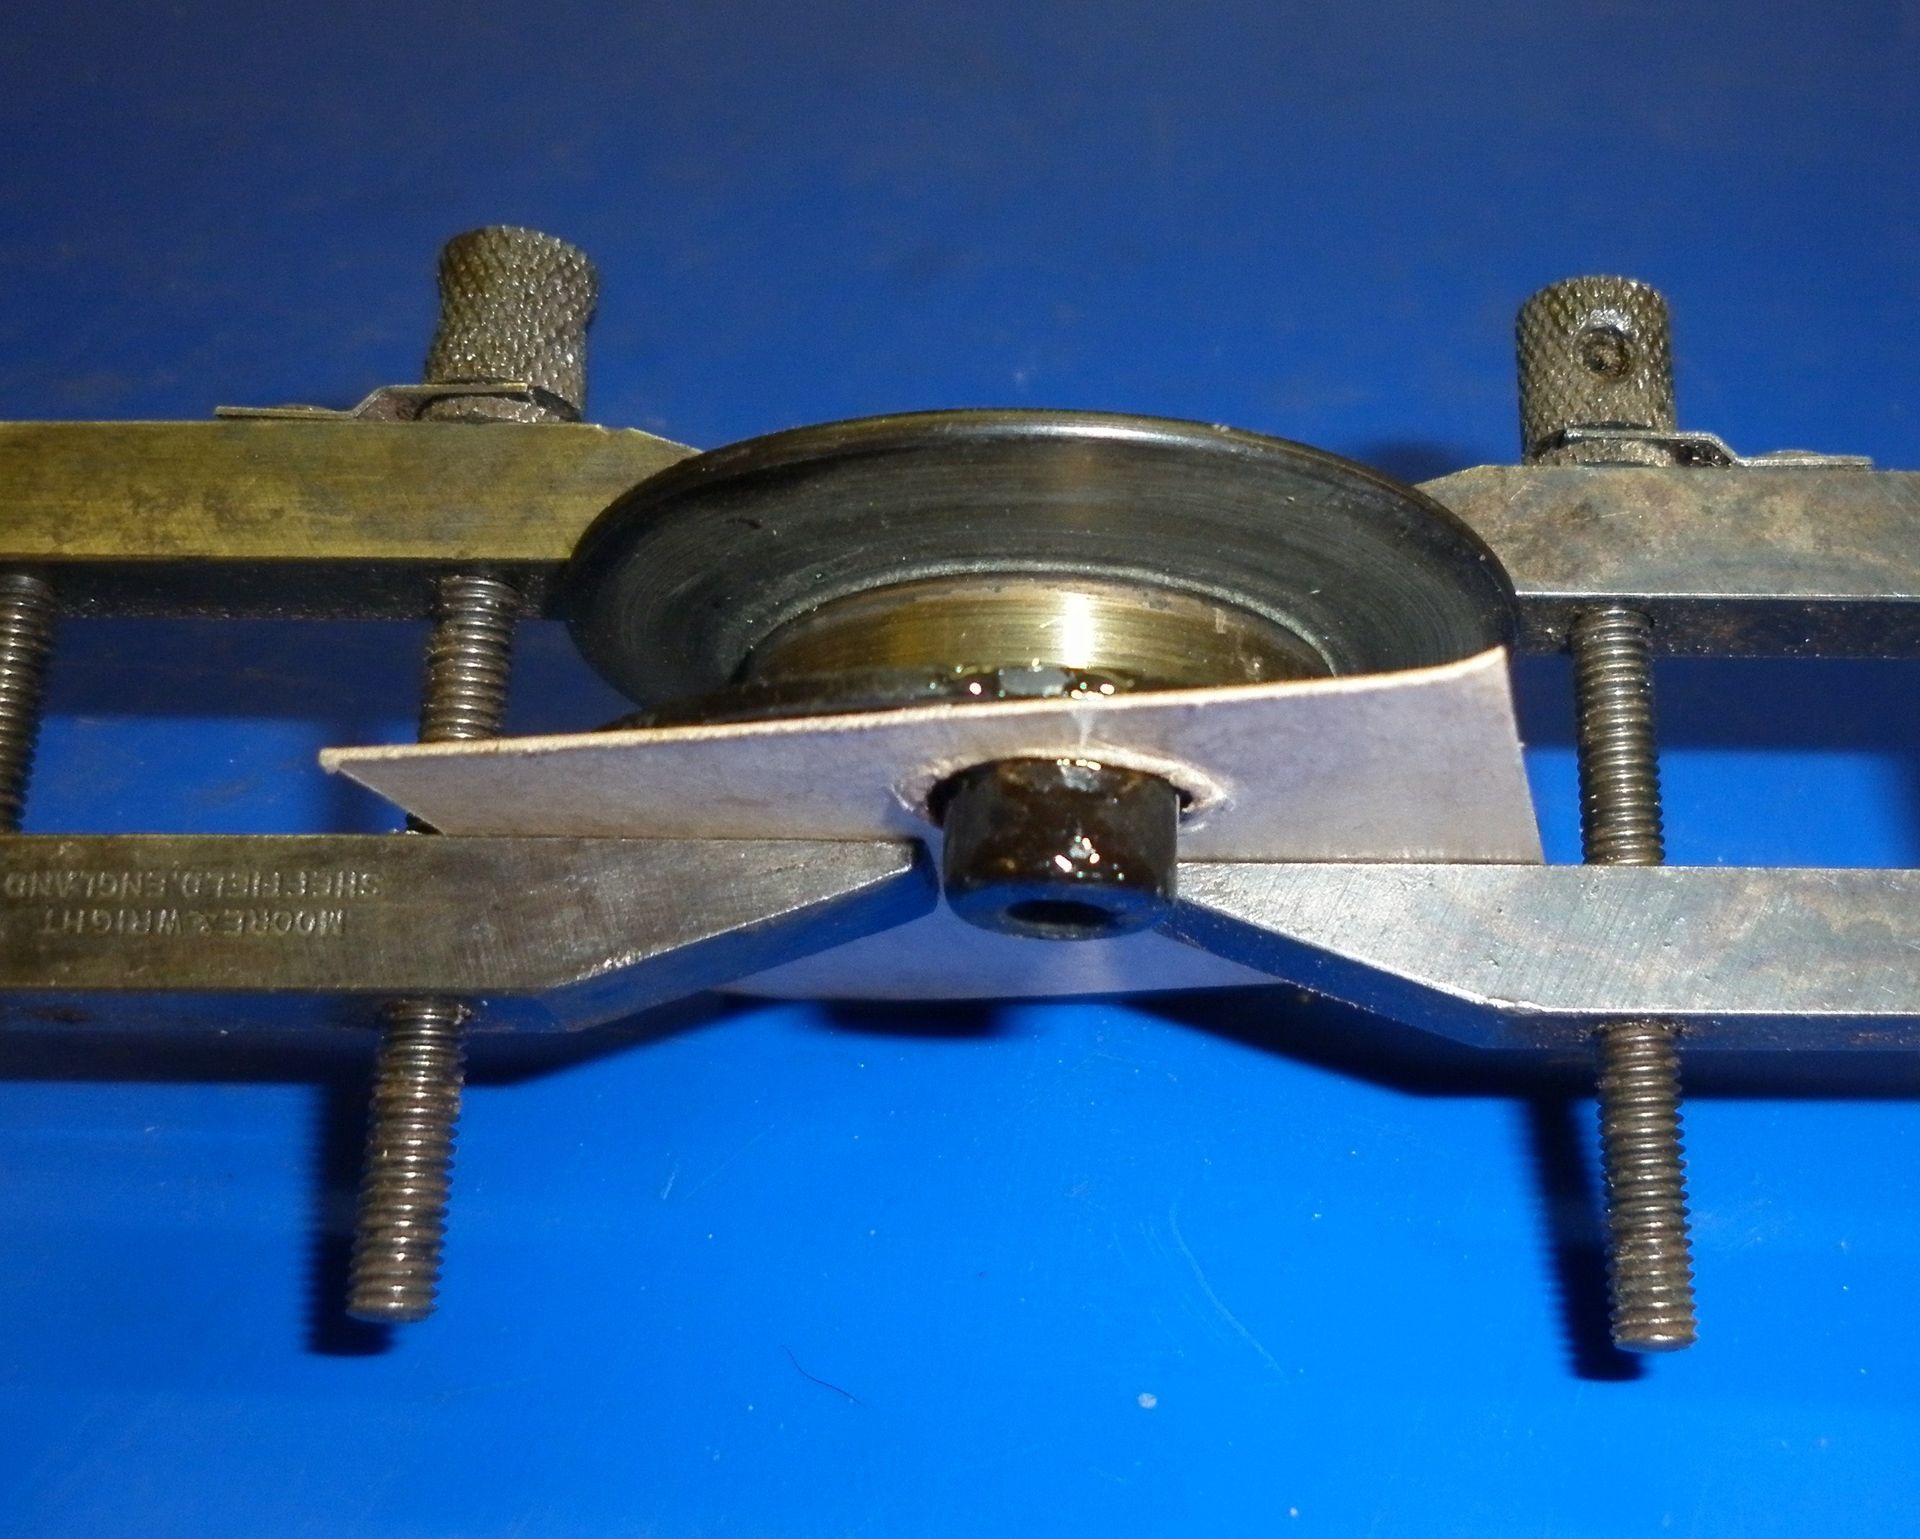
If the damage is on the other side, the same method could be used but is a little more involved as the HT spout needs to be taken into consideration. In these cases we often glue the broken pieces back together using Araldite - an excellent insulator. A series of small holes drilled at angles along the fractured edge are filled with Araldite to give an even stronger joint. A piece of card can be used for holding the parts in line - easily removed once the Araldite has hardened.
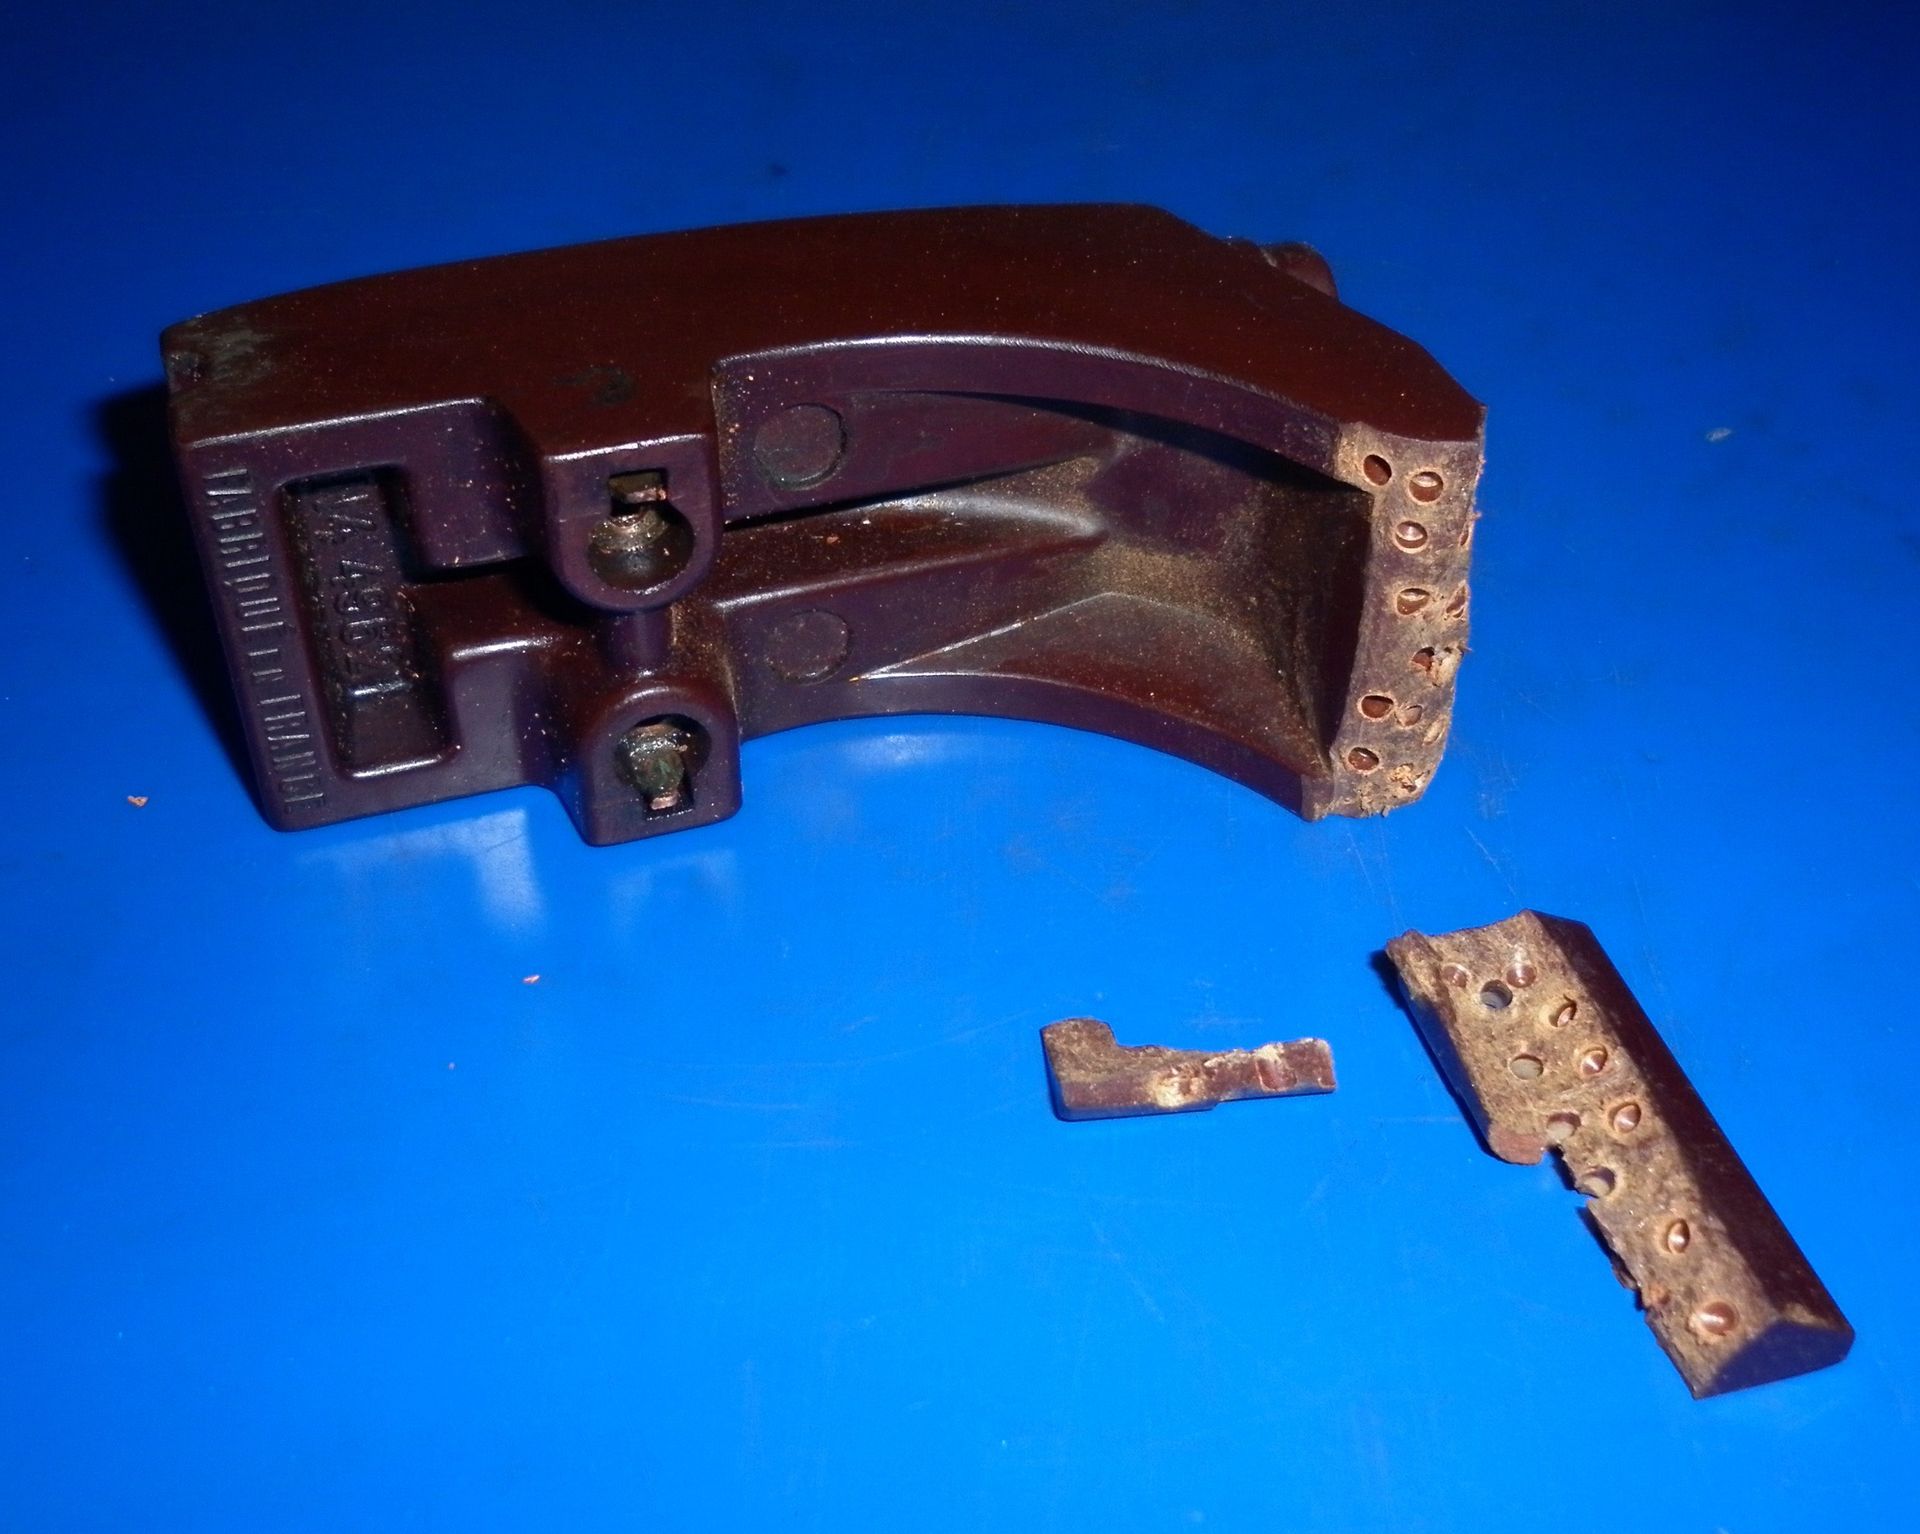
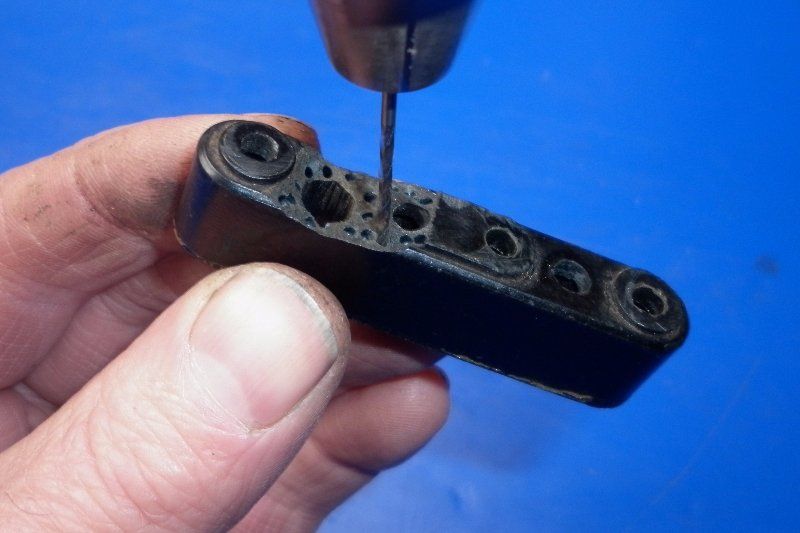
The same technique was used to repair this distributor block from a Scintlla magneto.....
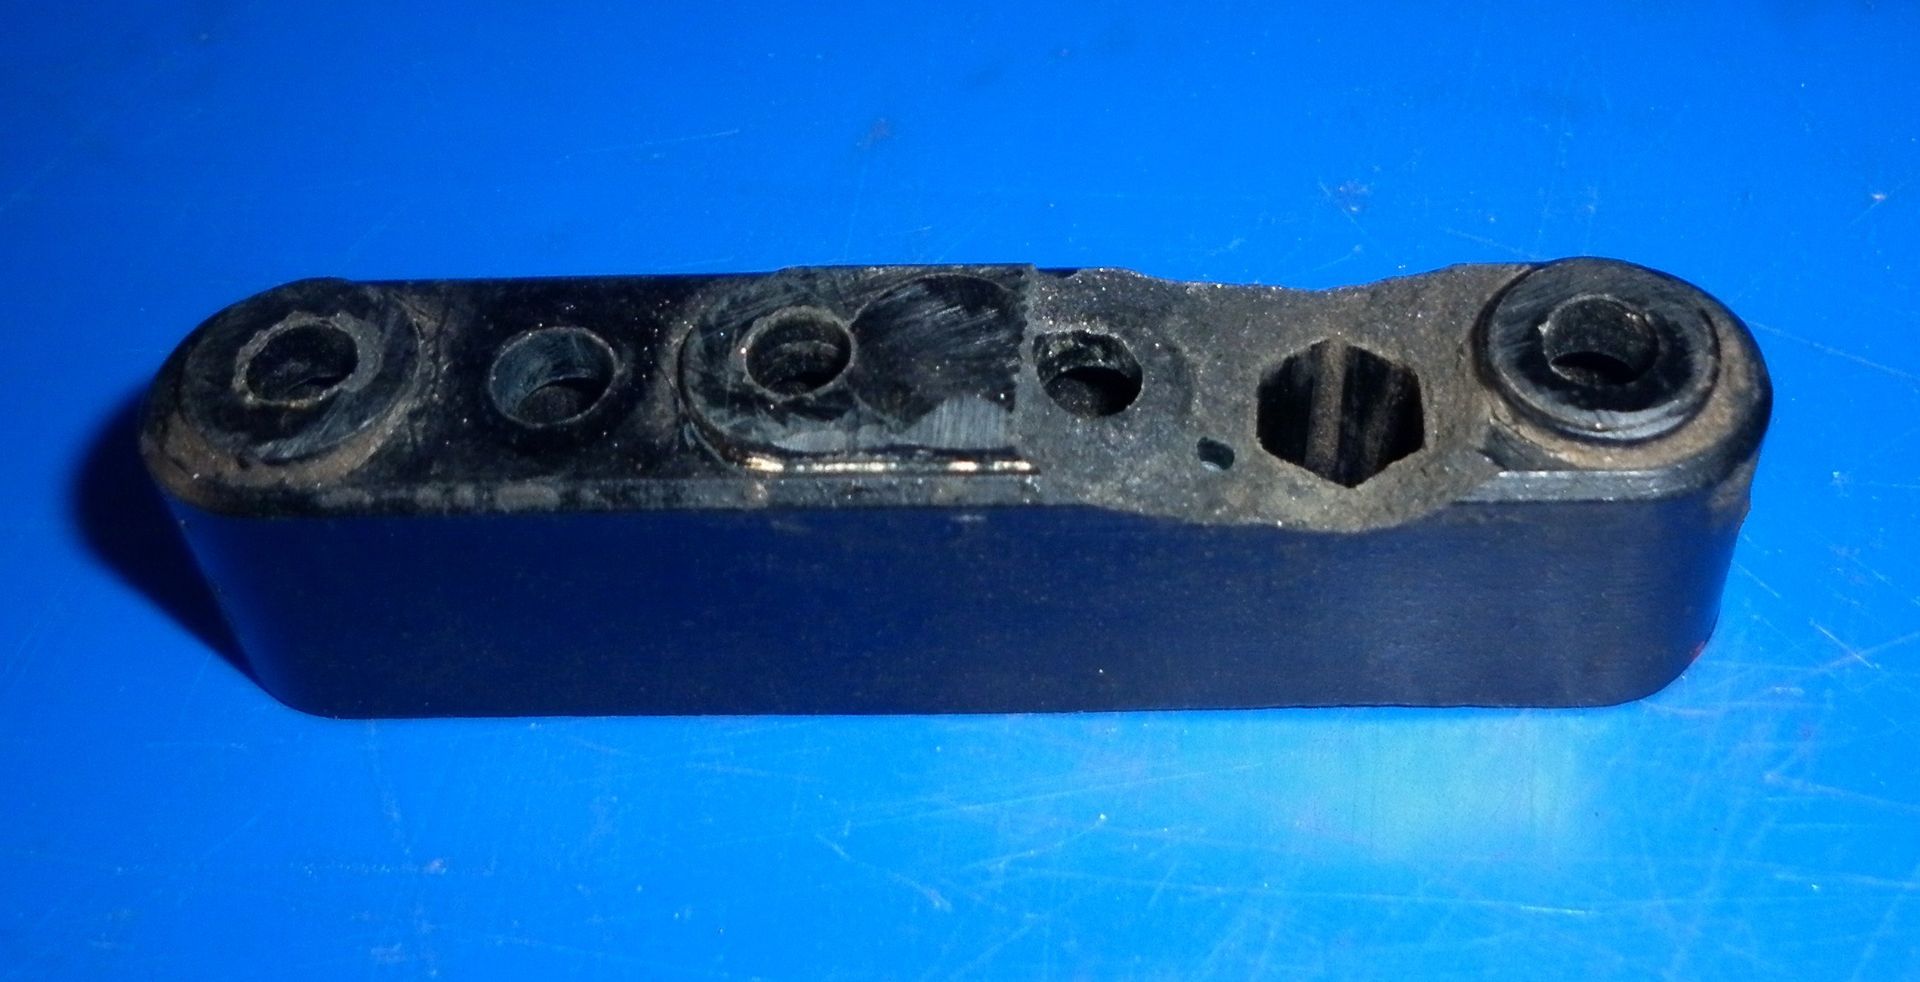
.....and to build up this chipped terminal block.
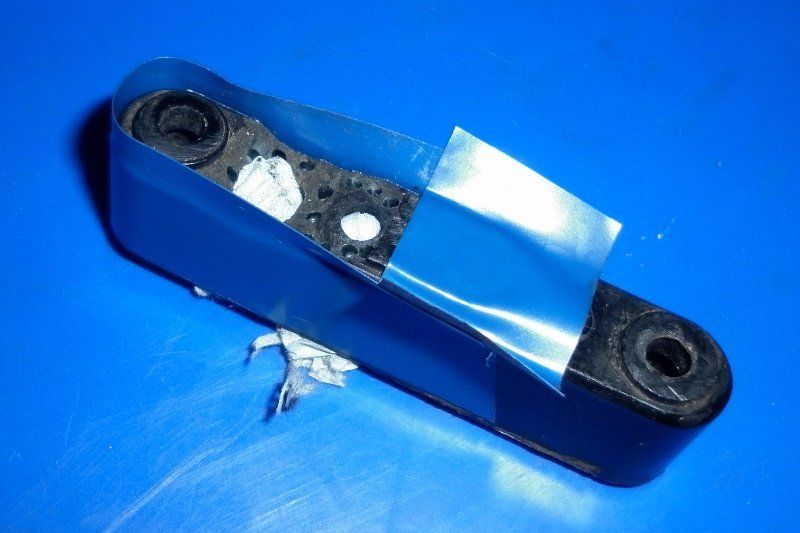
Note the use of tissue paper to keep the Araldite out of the holes and PVC tape used as a 'mould' to hold the Araldite in position while it sets.
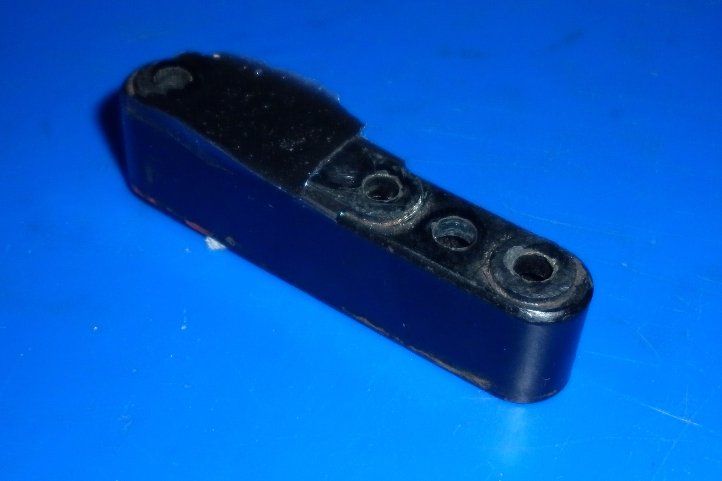
Once it has set, the hardened Araldite is easily filed to get the required shape and can be drilled or tapped as necessary.
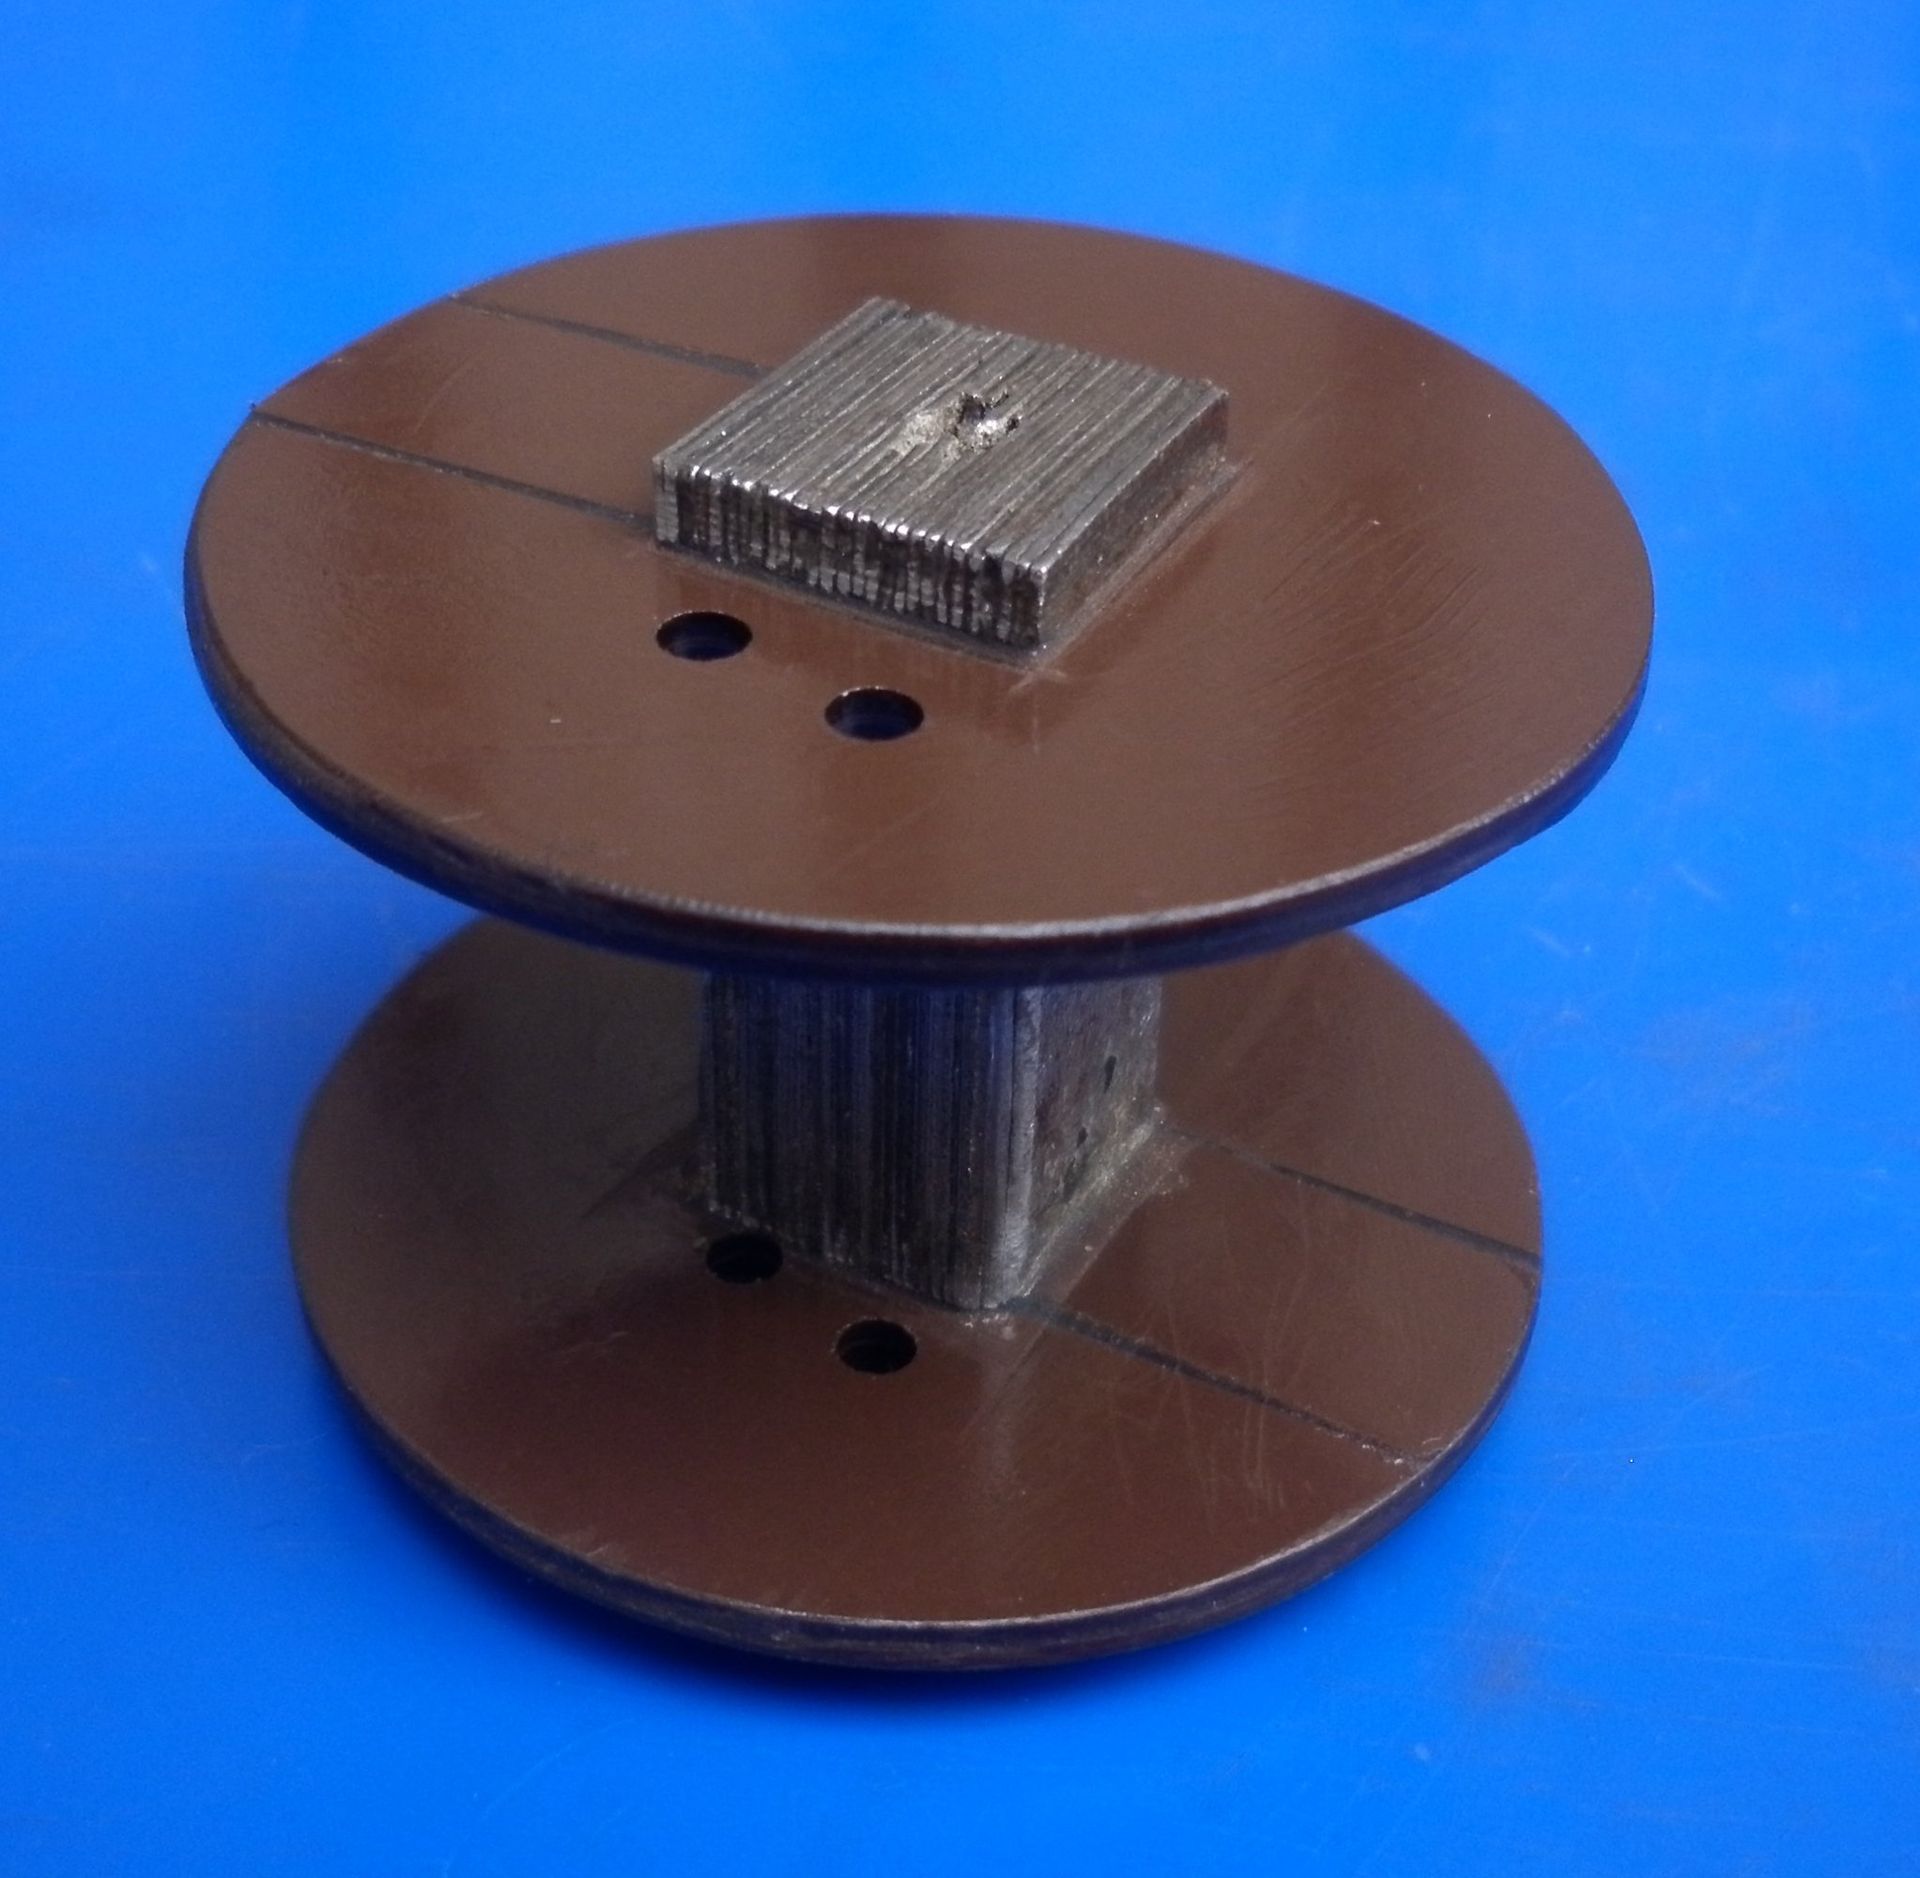
Here, a coil from a maglita has had new side cheeks made and glued into place.
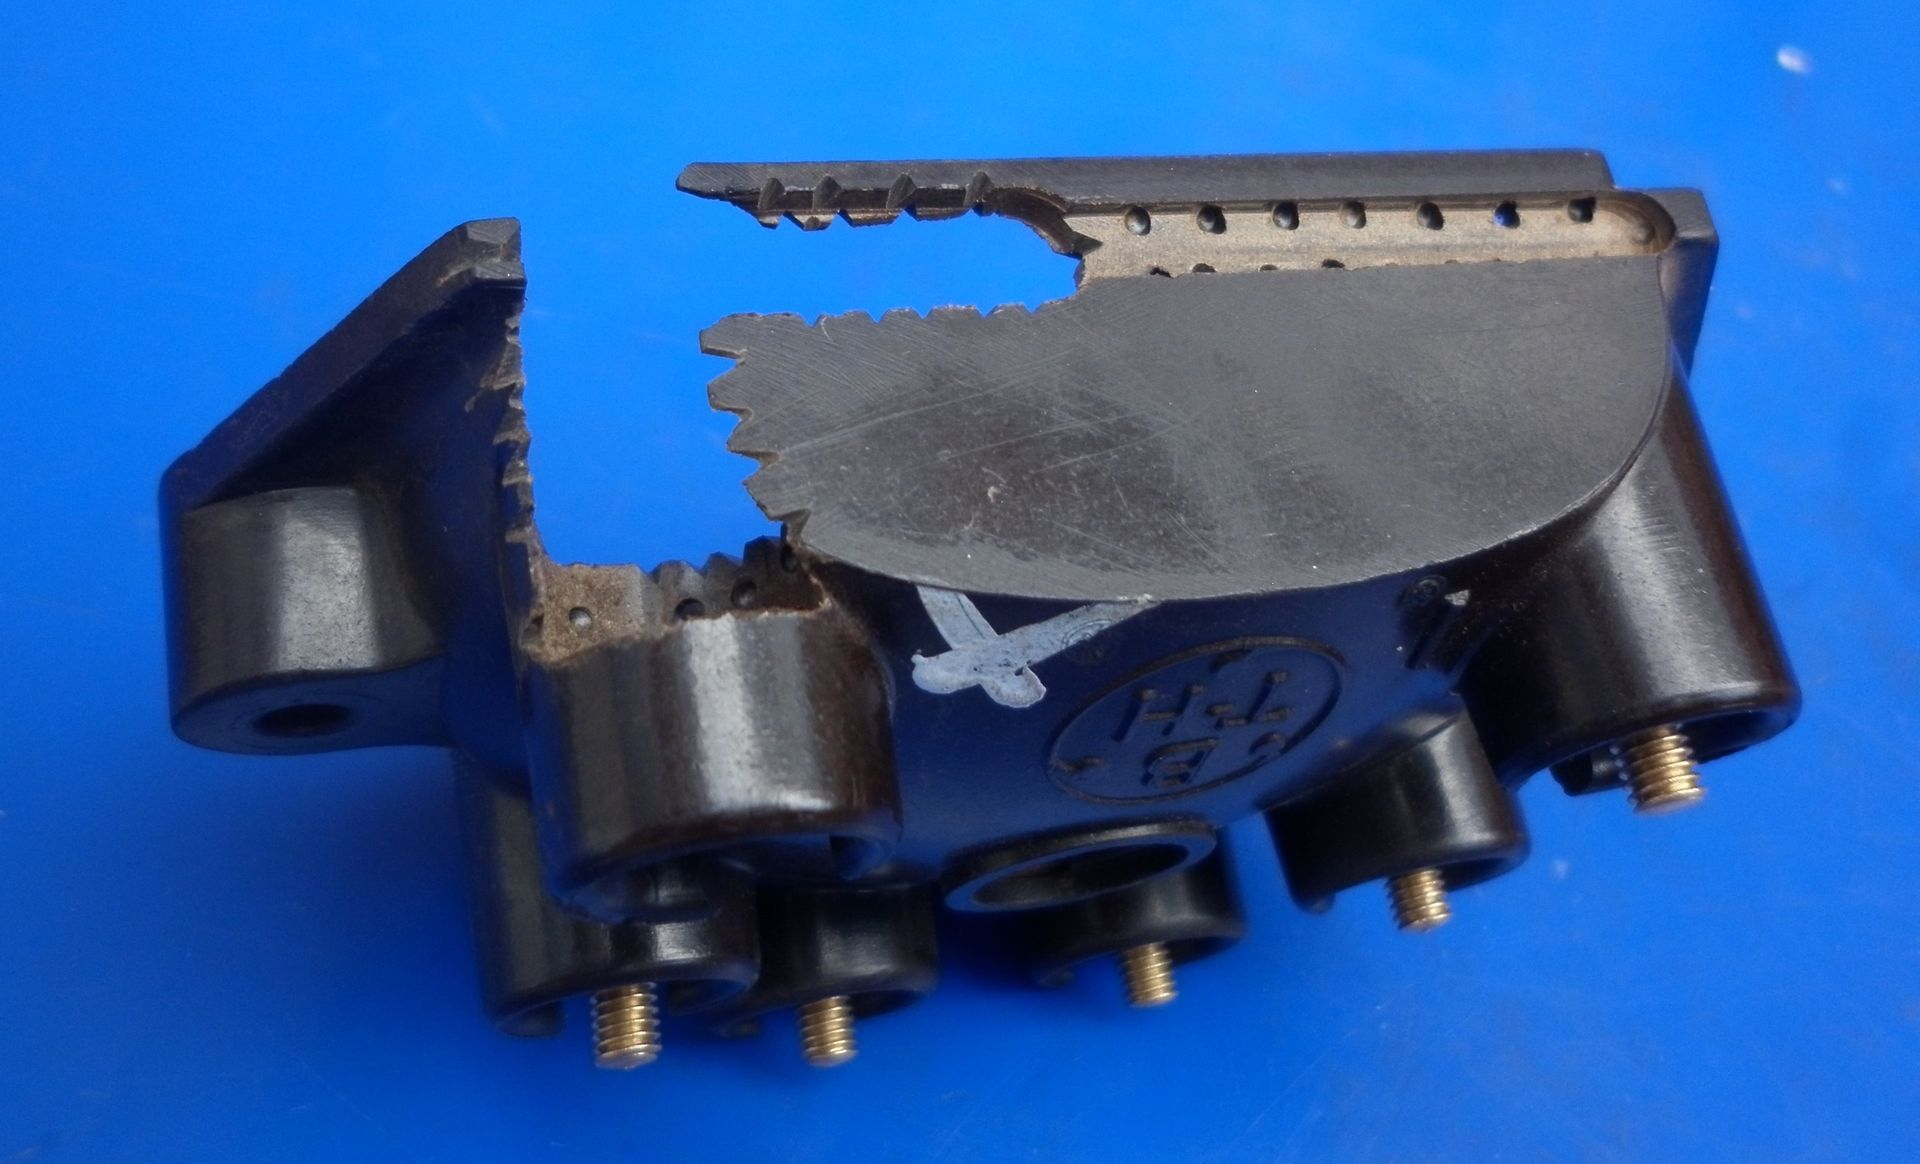
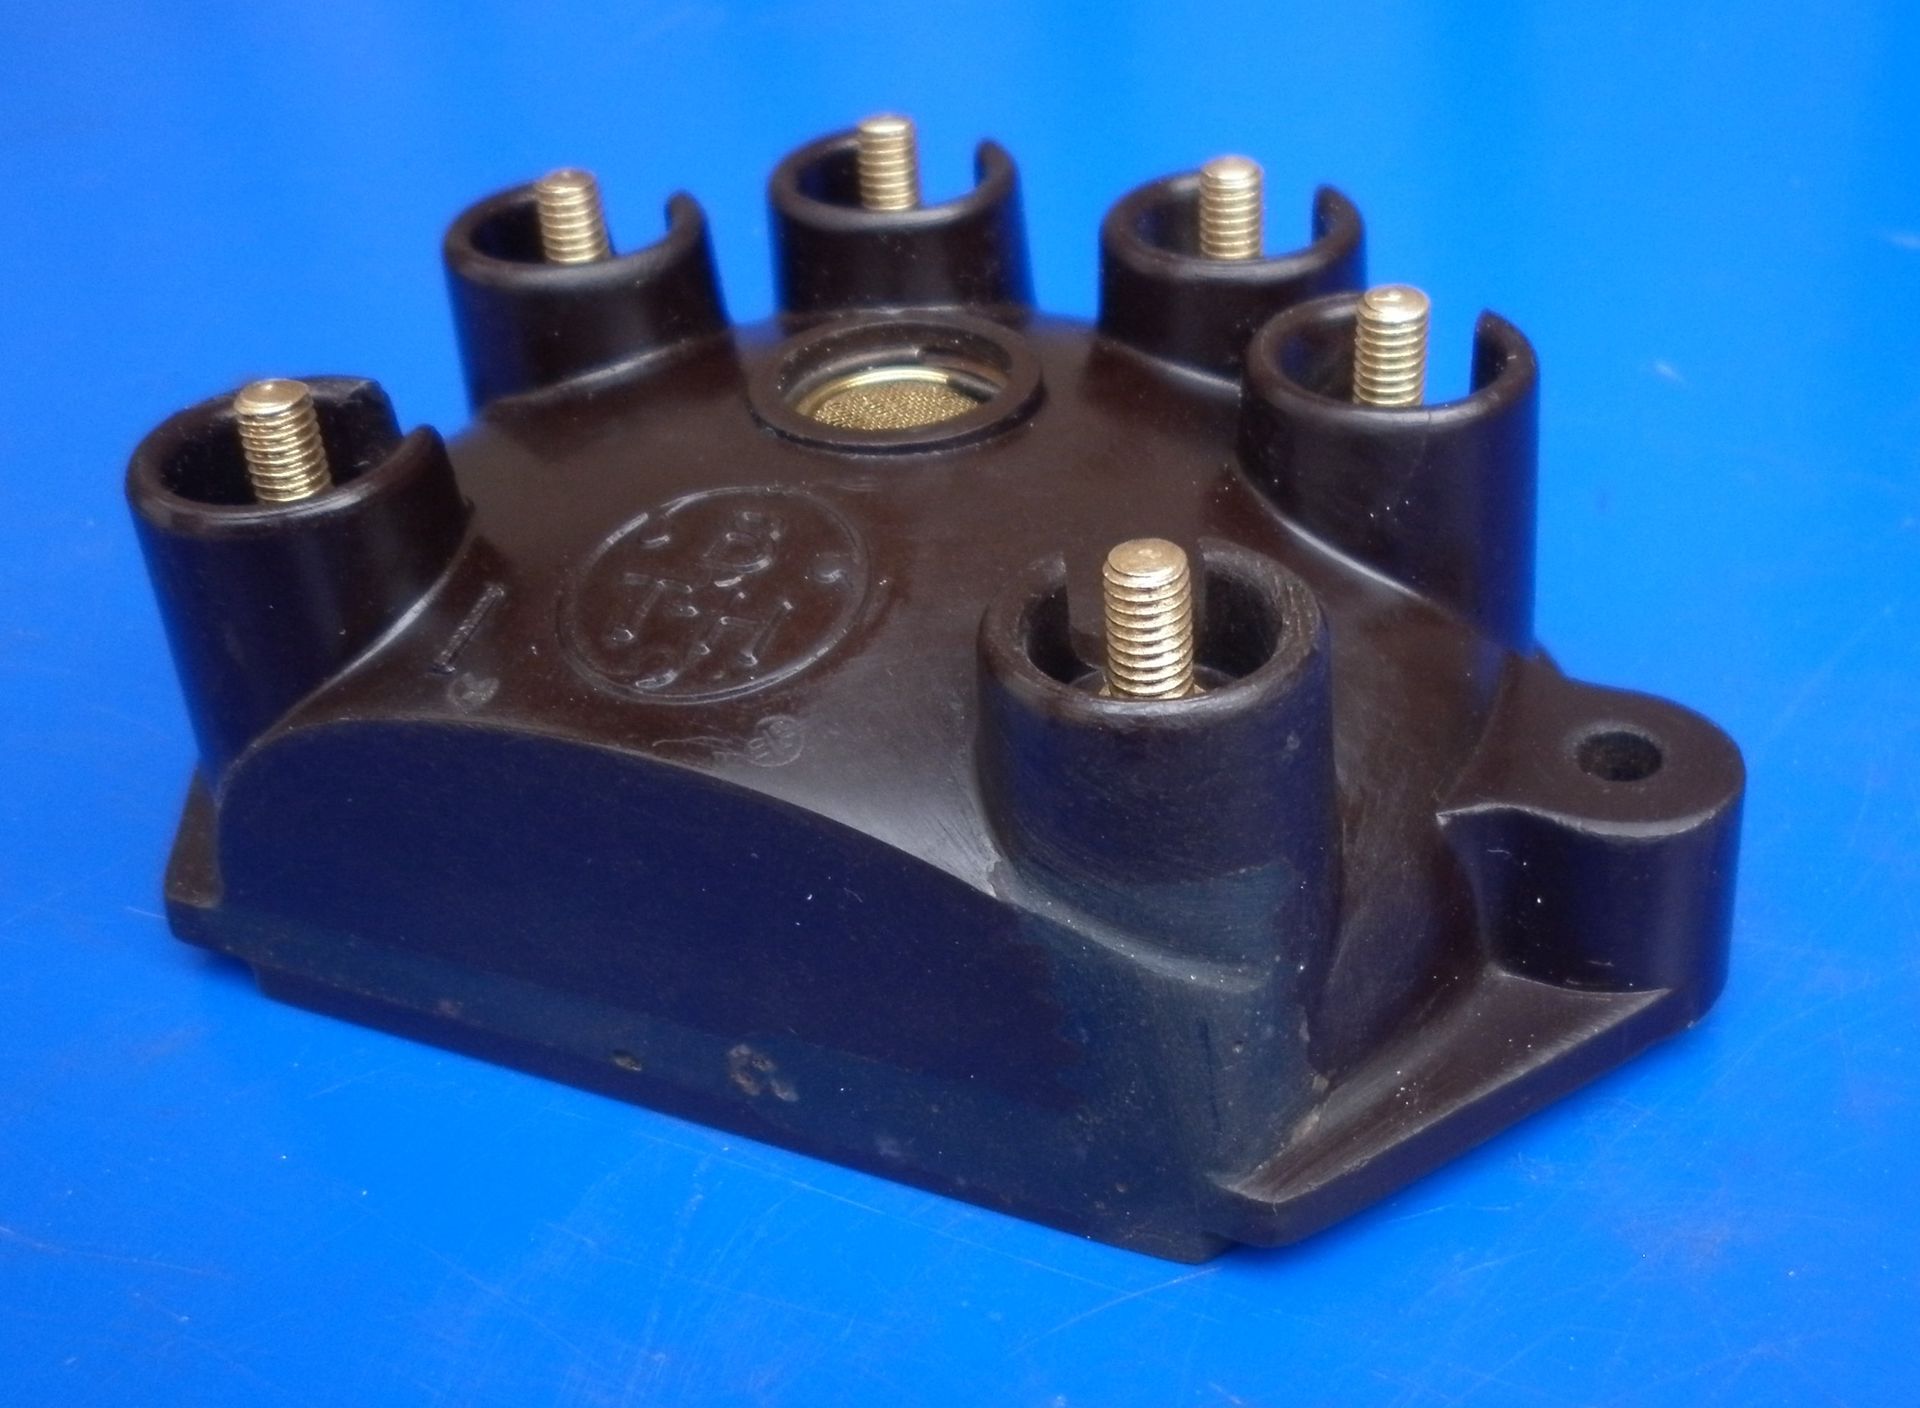
This BTH distributor cap was tracking to earth on one HT terminal causing bad misfiring. We did not have a replacement so we cut out the suspect area ensuring all signs of burnt tracking paths were removed and built up the cap with Araldite.
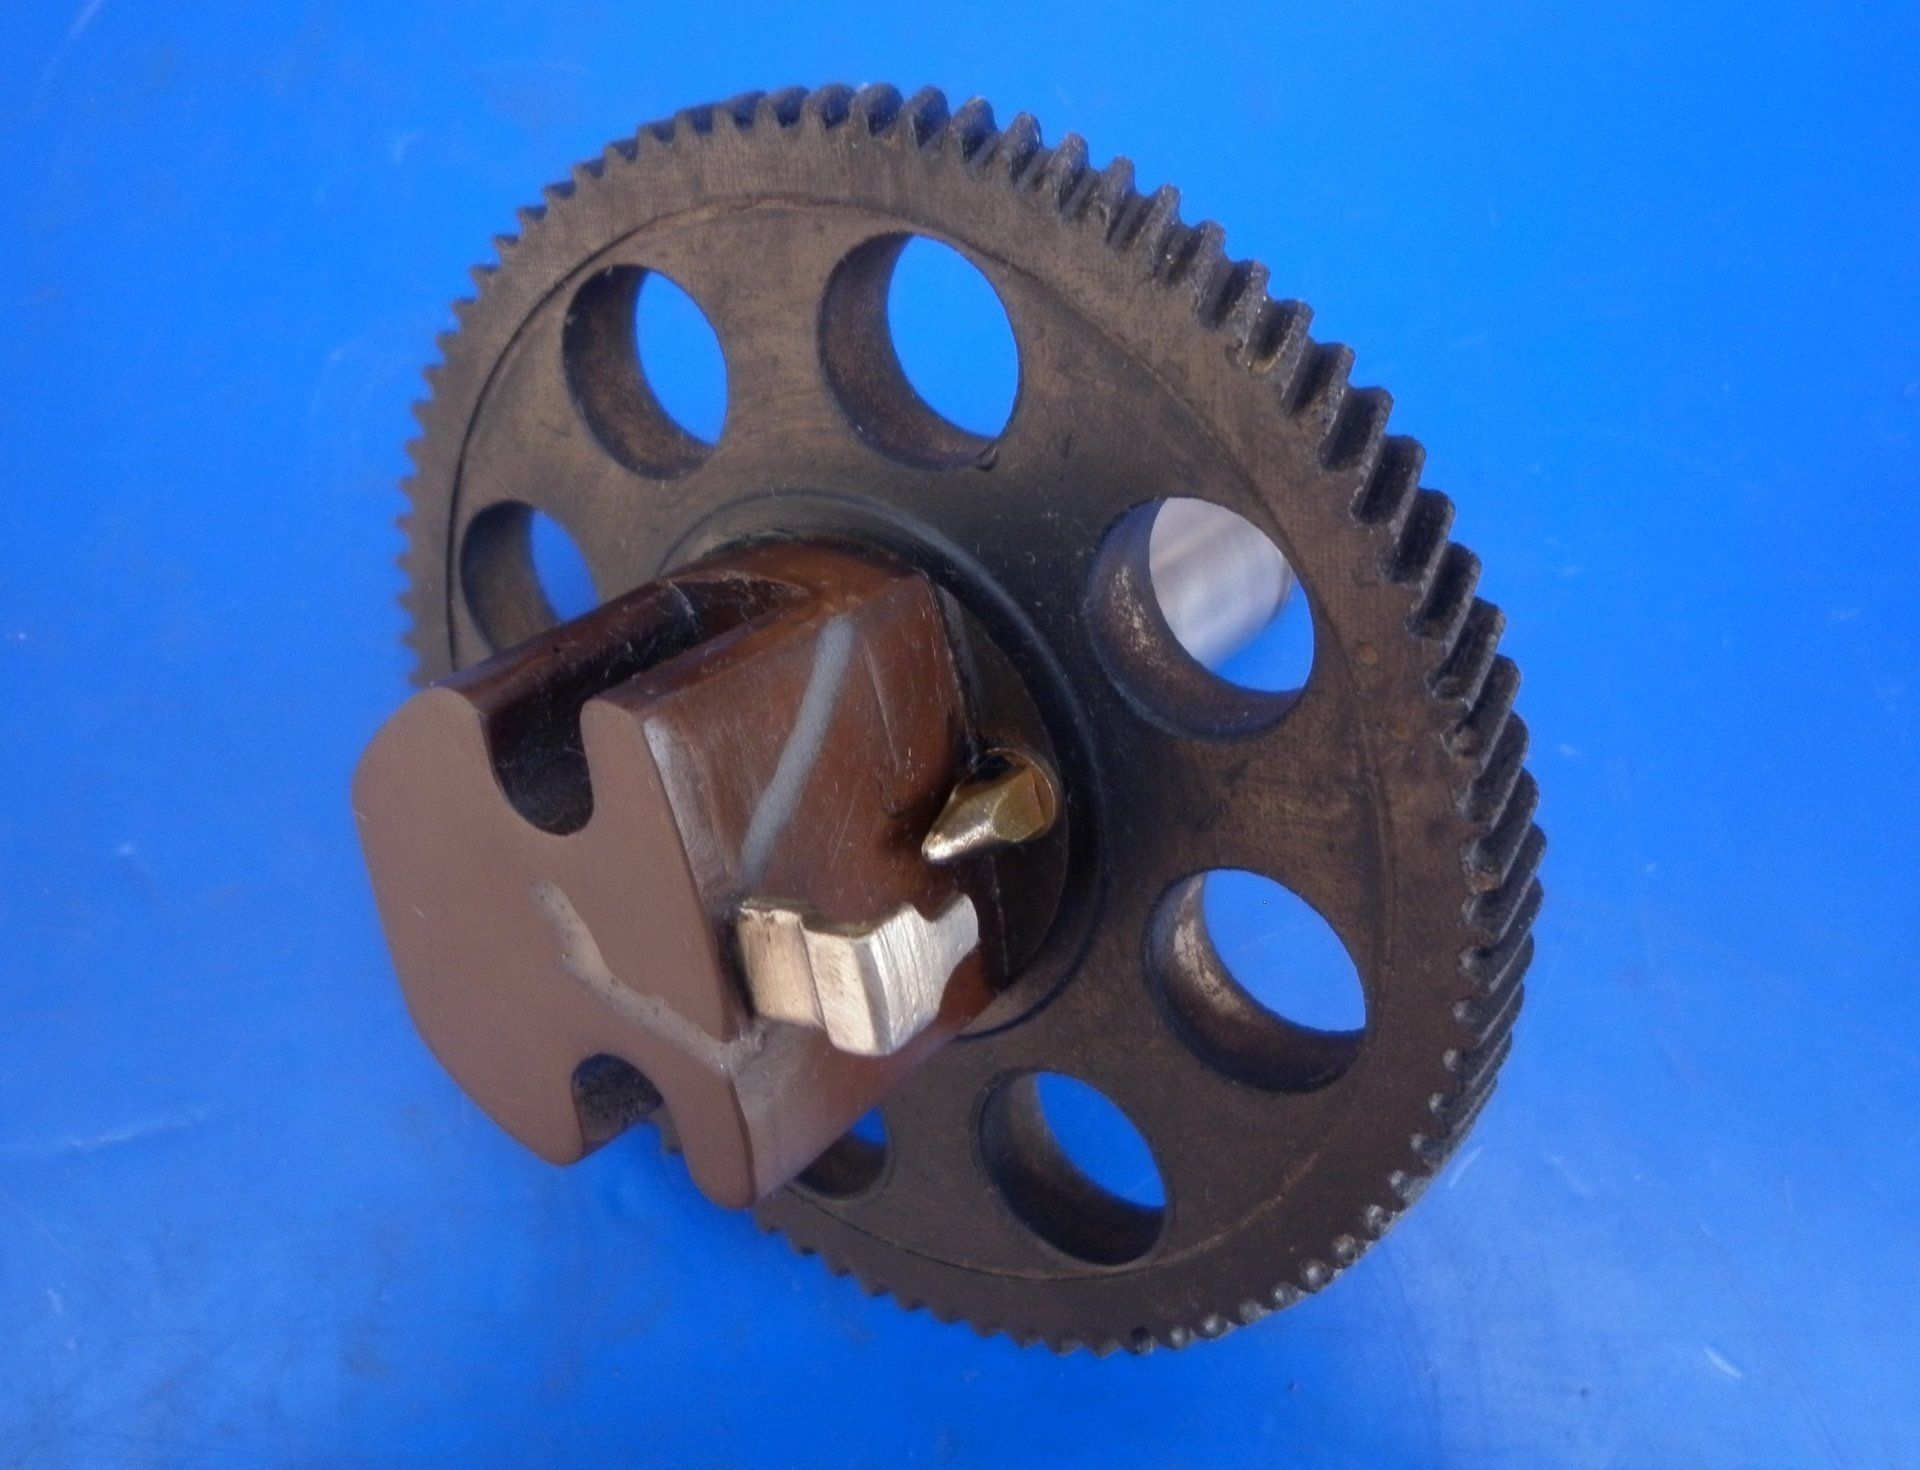
The crack in this rotor arm was repaired by using a Dremel to grind out a v shaped groove around the crack and then filling with Araldite.
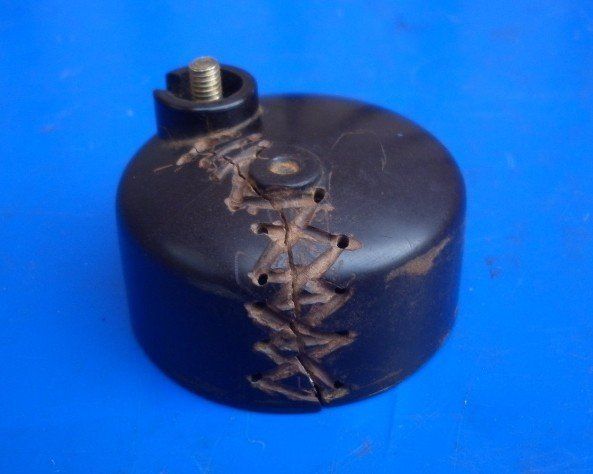
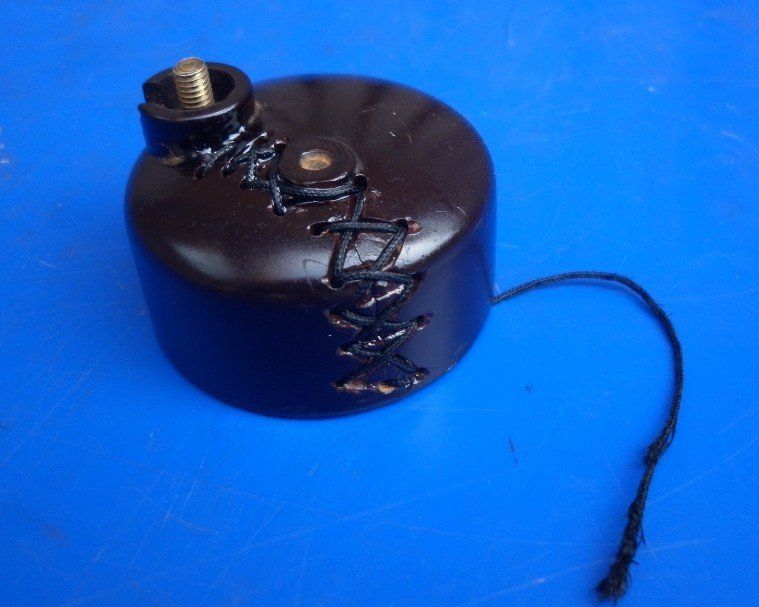
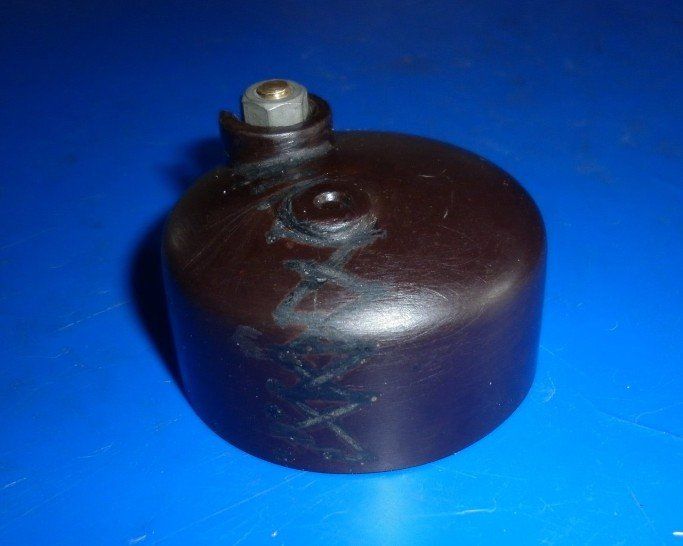
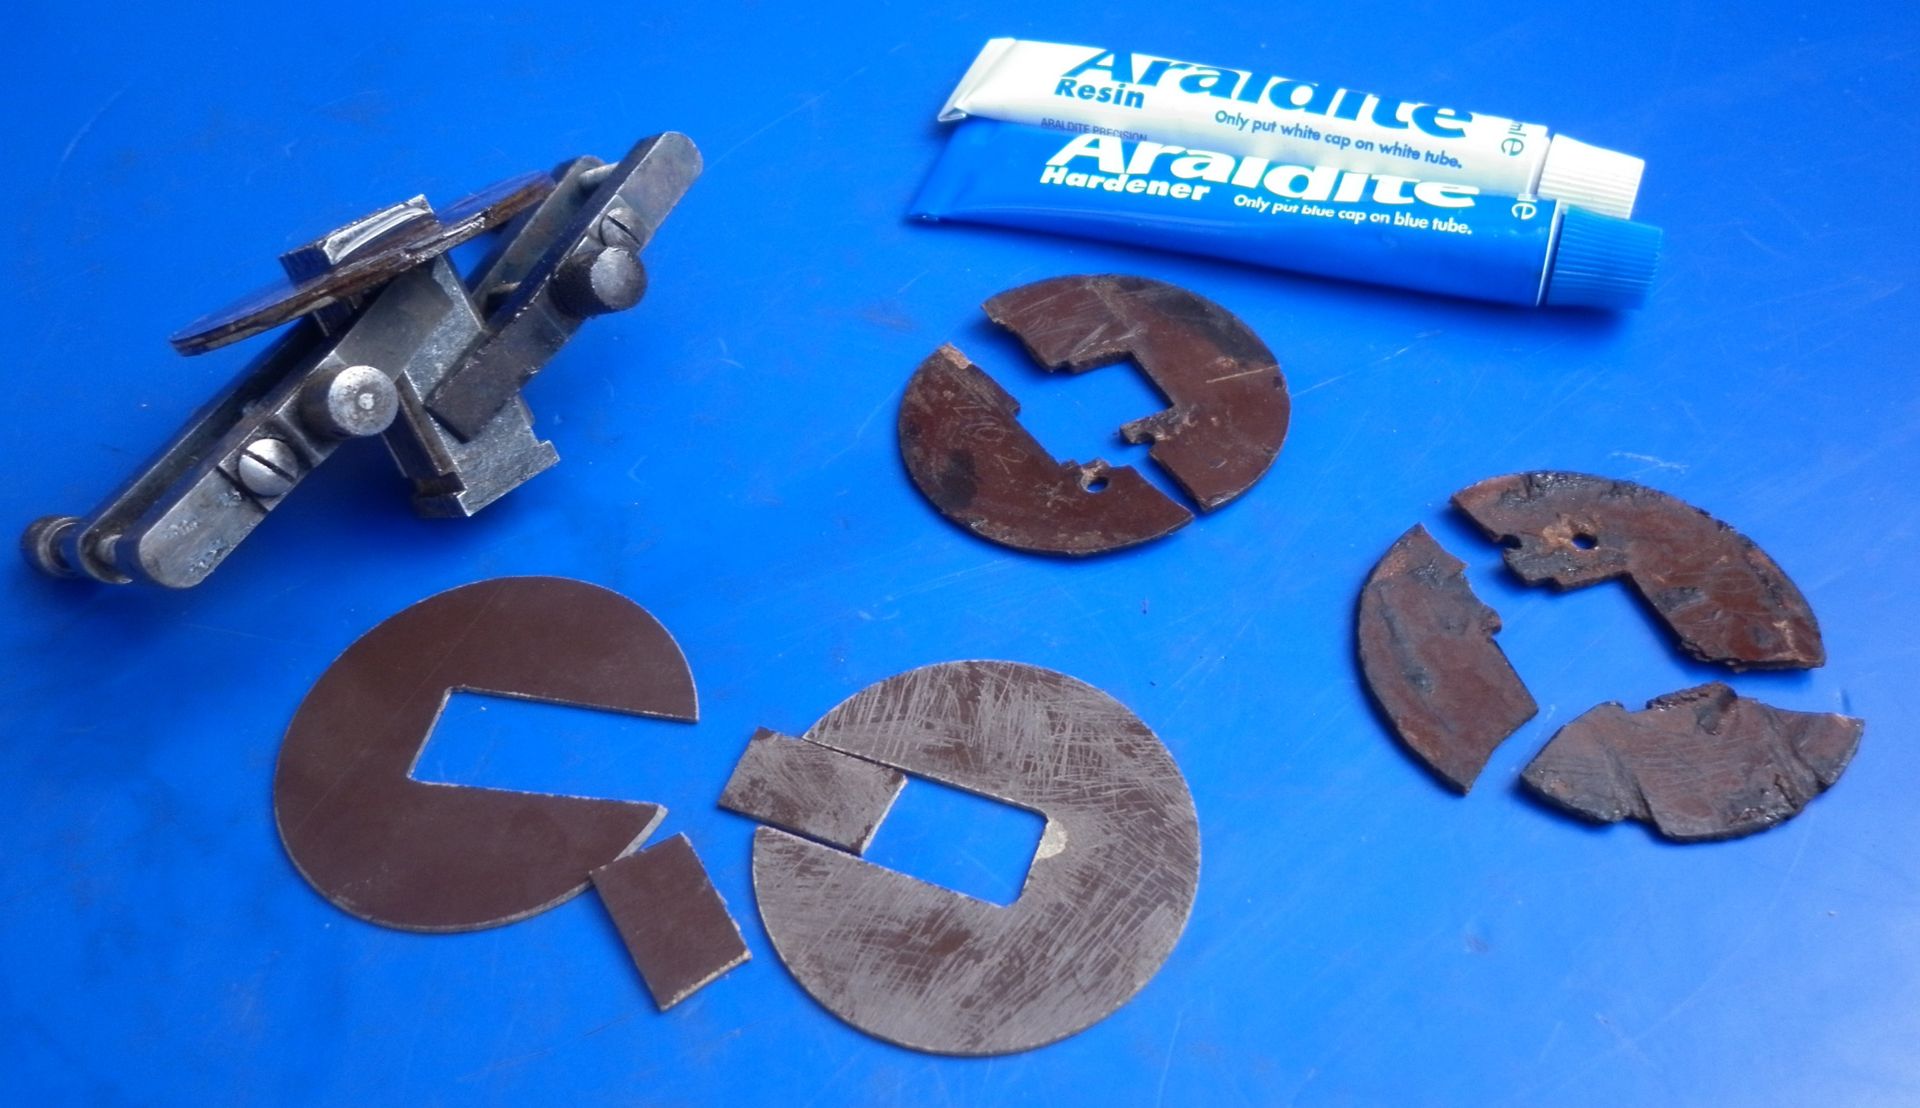
A cracked contact breaker points cap. First a series of holes are drilled each side of the crack and then a Dremel is used to join them up. Cotton is used to 'lace up' the crack and then the whole thing coated in Araldite. Once it has gone hard, the cap is cleaned up and sanded smooth - probably stronger than the original now !