Vacuum/Pressure Impregnation
Vacuum Pressure Impregnation (VPI) is a process that uses vacuum and pressure to seal porous materials with varnish or resin. The process is used primarily for high-voltage coils to fill gaps so as to create a void free insulation in the windings. Impregnating varnishes and resins are not designed to provide high build rates. They are designed to penetrate and seal the 'nooks and crannies' of the winding. Advantages of using VPI include:
- Increases the overall dielectric strength
- improves the mechanical bond of the winding insulation system
- improves inter turn insulation
- Improves heat transfer
- provides increased protection against moisture, oils, greases. dust, etc.
The equipment required
There is quite a list of equipment needed but if the job is to be done properly.....
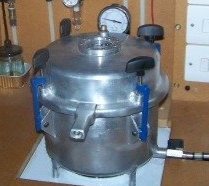
This picture shows the VPI bench we made to meet our exact requirements.
Pressure Chamber:
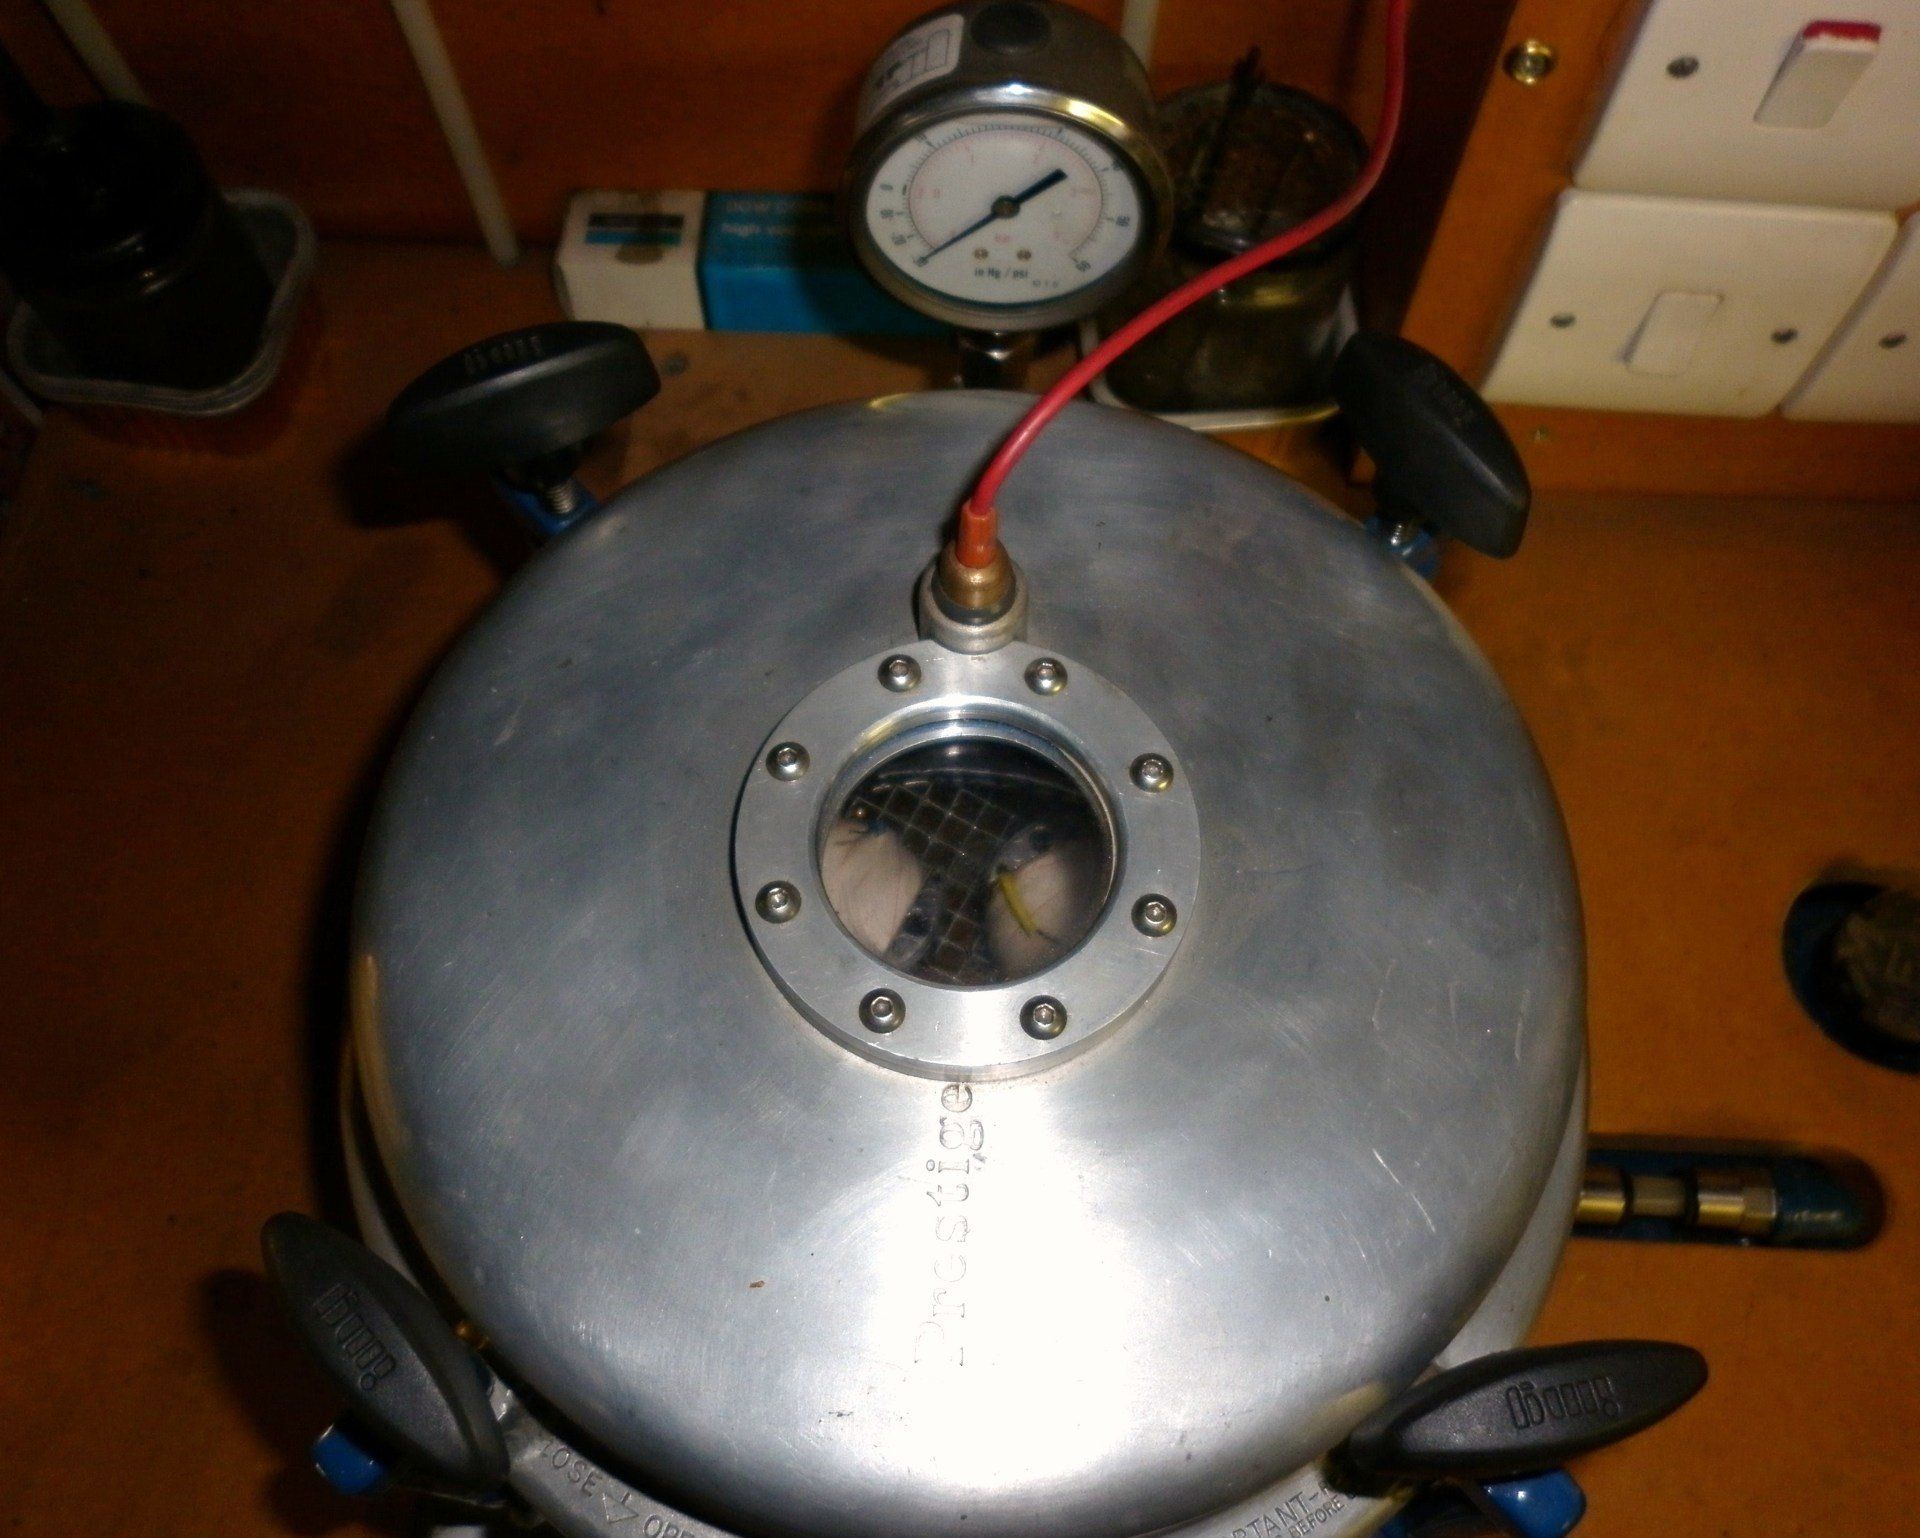
Ours started off life as a Tower Prestige pressure cooker. We welded on four clamps to clamp the lid shut when holding a vacuum. We also modified the lid to provide a viewing window and added a ring of leds inside the lid to light up the inside of the chamber when required.
Oven:
A second hand table top domestic oven. We removed the top rings and added a thermocouple inside so that we could monitor the temperature.
Resin reservoir:
The blue painted can to the right of the oven. The resin has a higher viscosity at low temperatures and does not flow very well. We overcome this by sitting the reservoir on a heater platform normally used in home brewing.
Vacuum pump: The grey unit on the bottom shelf. Fitted with a filter in the bottom right hand corner.
Air compressor:
Also on the bottom shelf. Ours was originally designed for use with a spray gun.
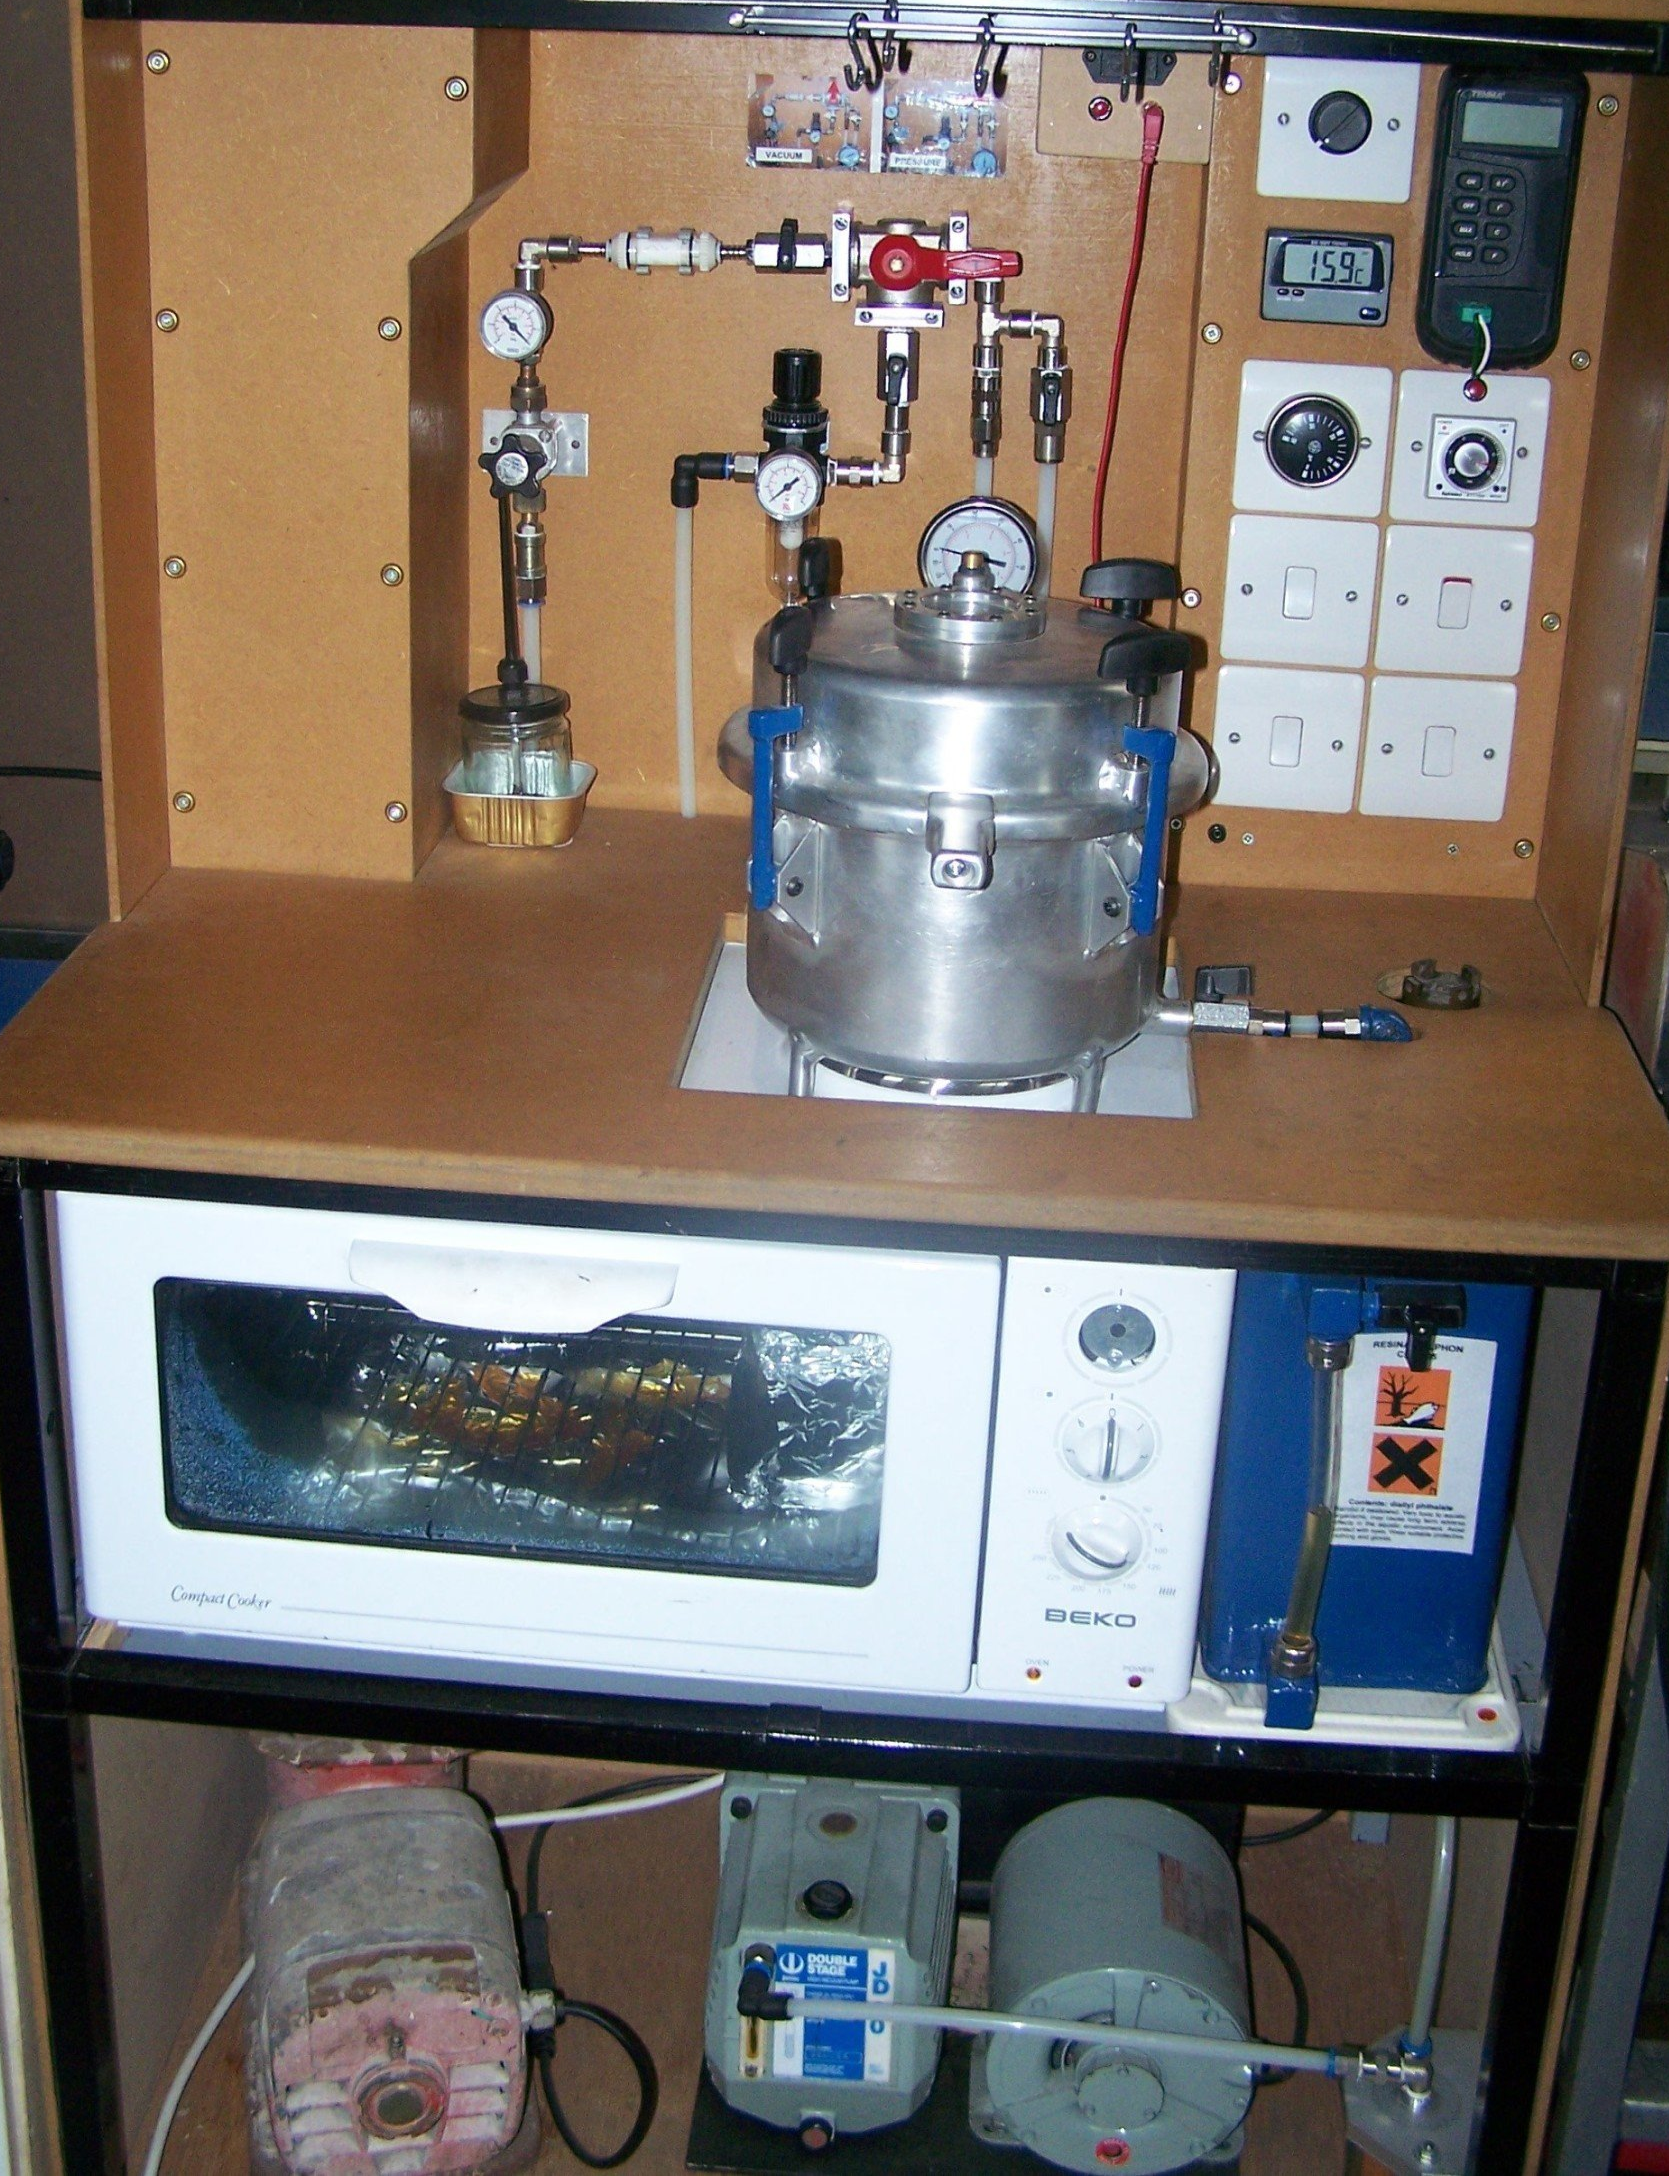
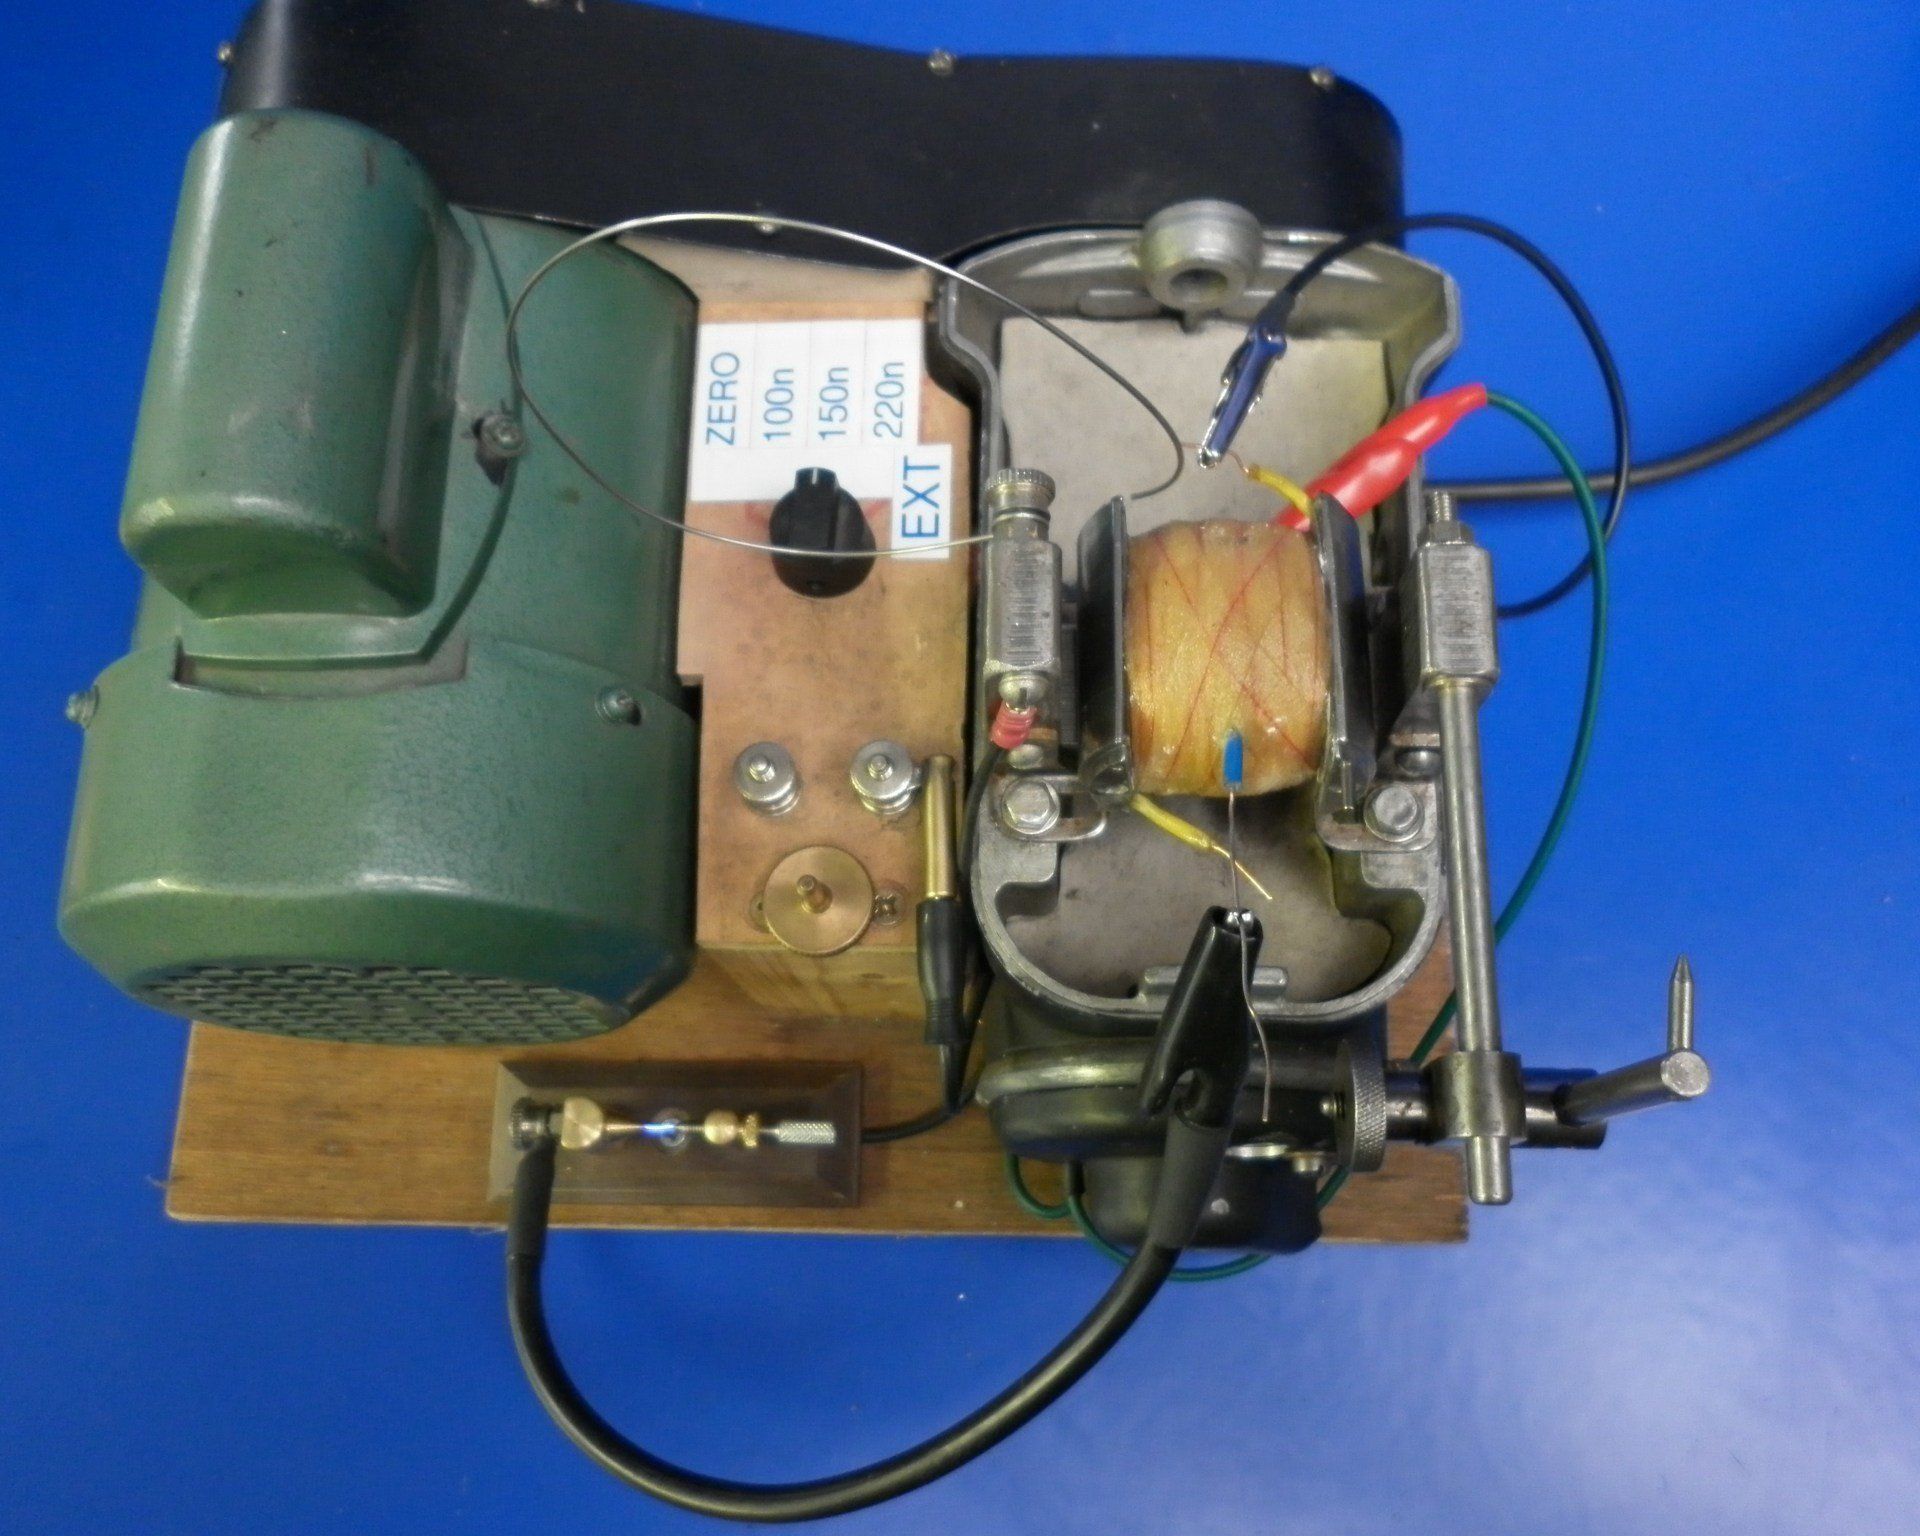
Behind the vacuum chamber can be seen the pipework, taps and gauges used to connect the vacuum chamber to either the vacuum pump or the compressor as required. The large gauge partly hidden by the vacuum chamber is a combined pressure and vacuum gauge showing the situation inside the vacuum chamber.
The switch panel to the right of the pipework controls the following working from the top row left to right and downwards:
Extractor fan: On/off and speed control. The fan was included to clear fumes from the rear of the oven up through the duct work to the left of the pipe work.
Large temperature meter:
displays oven temperature
Small temperature meter:
displays resin reservoir temperature
Round black knob:
sets and controls temperature of the heater platform under the resin reservoir
Timer switch:
controls on/off times for the oven
Switch top left:
on/off control for the heater platform under the resin reservoir
Switch top right:
master on/off control for the oven. Feeds the oven timer switch
Switch bottom left: on/off control for the vacuum pump
Switch bottom right:
on/off control for the compressor
Just to the left of the switch panel is a red wire. This is plugged into a socket on the lid of the vacuum chamber and a push button switch operated to power the leds inside the vacuum chamber.
The Vacuum Pressure Impregnation Process
VPI is a fairly time consuming process but in our opinion is essential for a good, reliable magneto coil. This section describes the way The Magneto Guys do it. We would hasten to state that it is not the only way to do it and it is not essential that you do it this way. This is just the way we have evolved our process and we know it works:
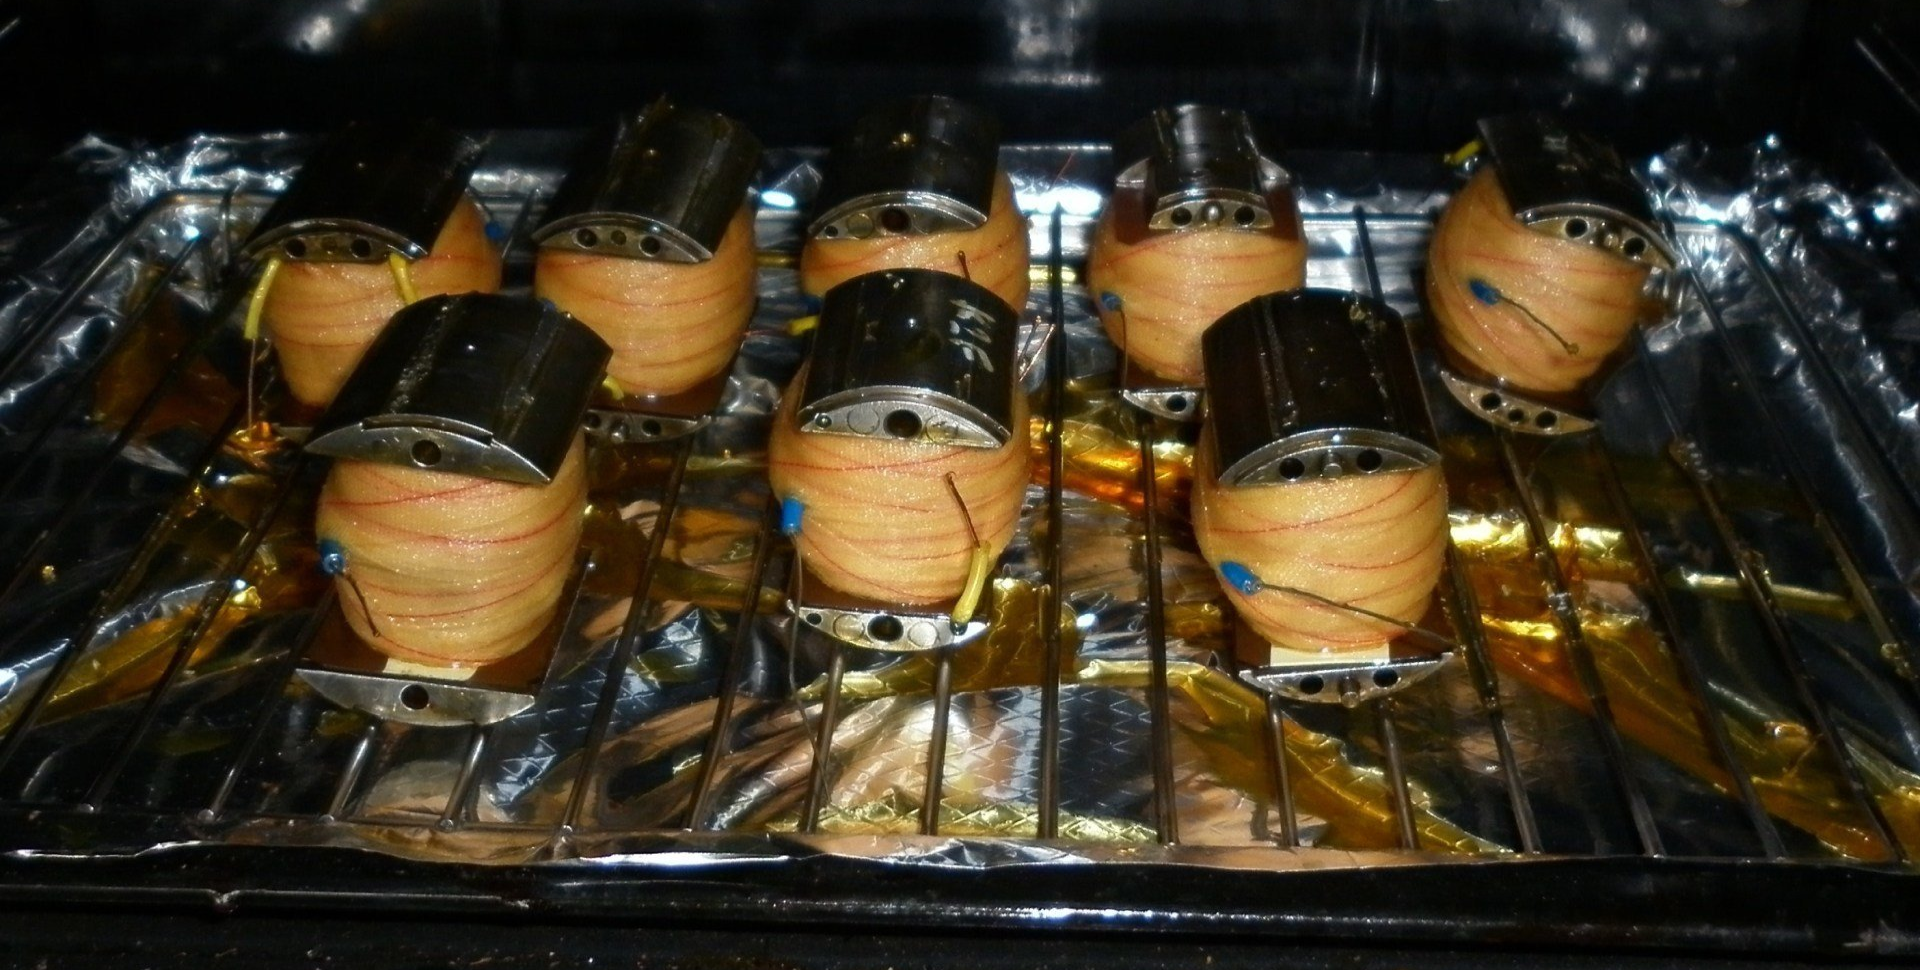
Preheating: Place the rewound coils in the oven for two to three hours at 120-125 degrees C. This is a high enough temperature to drive off any residual moisture, oil components and other volatiles.

Dry Vacuuming: Move the coils to the vacuum chamber and draw a vacuum of at least 29 ins Hg. This removes air and any remaining moisture from the coils. Leave the coils in the dry vacuum for one hour which allows the coils to cool down after the preheating stage.
Never put a hot coil straight into the resin!
If you do, the resin will start to cure immediately thereby producing a barrier which prevents the resin being drawn into the windings.
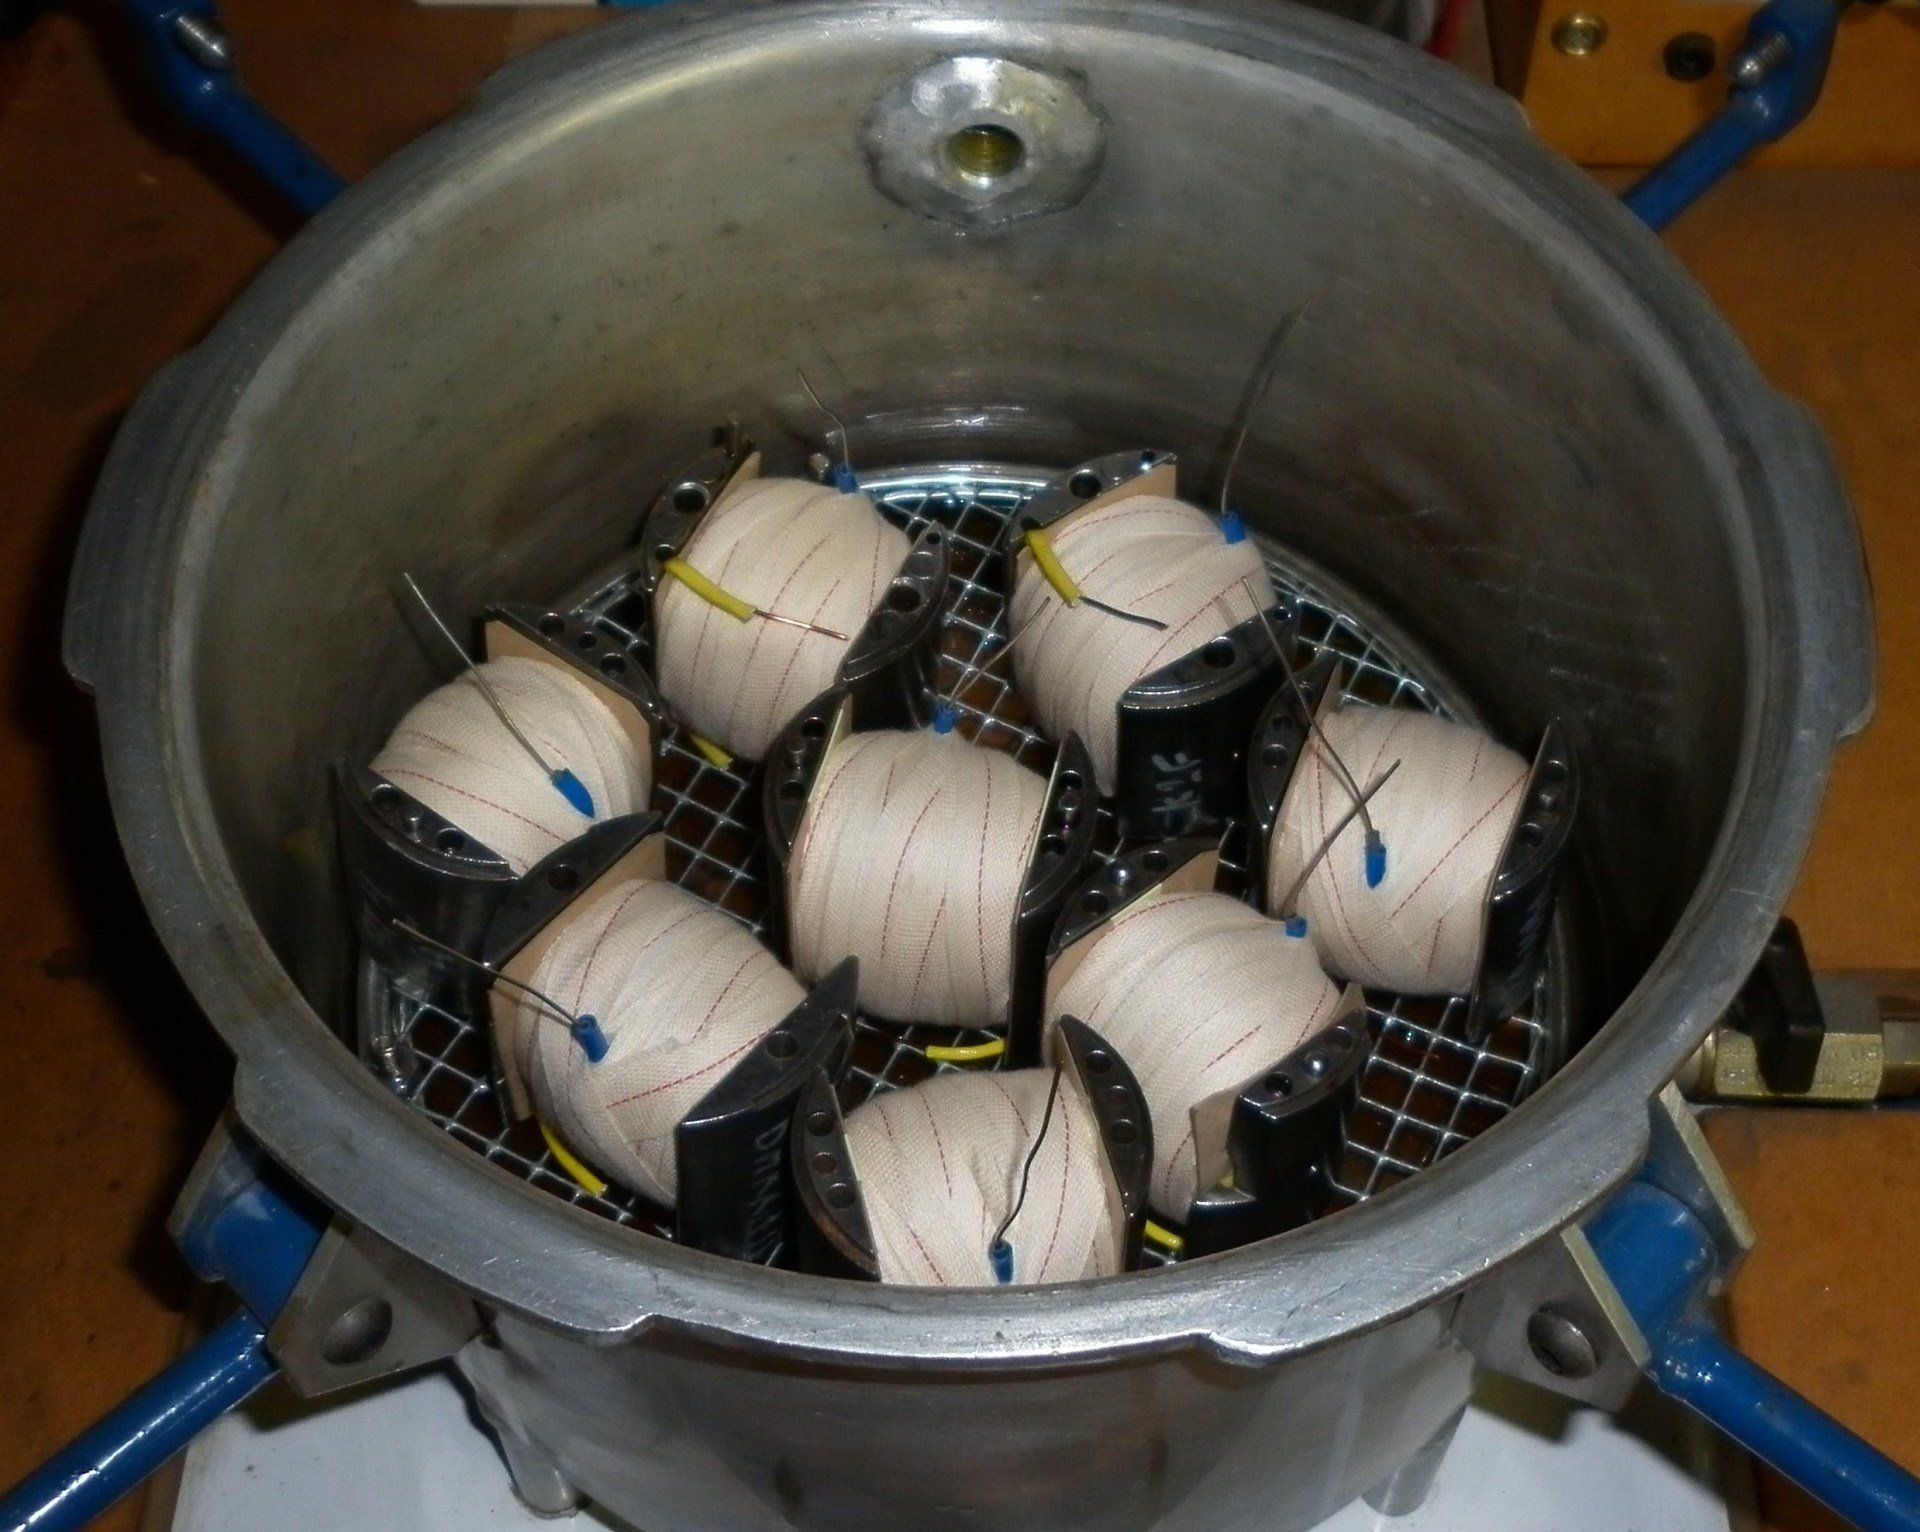
Filling:
Open the tap to the resin reservoir (bottom right hand corner) and allow the vacuum to slowly draw the resin up into the vacuum chamber. The viscosity of the resin means this will take several minutes. Keep an eye on the process and close the tap when the coils are well covered by the varnish but before the varnish level rises enough to be drawn into the vacuum gauge!
Wet Vacuuming: The coils are left in the wet vacuum for a minimum of four hours.
Pressure: Release the vacuum and pressurise the pot to 35-40 psi for one hour. This drives the resin into all the hard to reach cavities. This step is often omitted by some but here at The Magneto Guys, we consider that the results can only be improved by it's inclusion.
Draining:
Open the tap to the resin reservoir and allow the pressure to force the unused resin out of the vacuum chamber and back into the reservoir. Again, this will take a few minutes but keep an eye on the process so that the tap can be closed as soon as the level has dropped below the coils and before it reaches the drain hole. It is not a good idea to pump air into the reservoir! If you do, it will bubble up through the resin and air in the resin will make it less efficient next time it is used. Then vent the remaining pressure and open the pot. Use a metal rod to wipe excess varnish off the coil back into the chamber. It is particularly worthwhile cleaning off the resin from the metal sides and to use a metal rod of appropriate size to push excess resin out of any holes. It will all have to be cleaned off at the end of the process anyway and it is easier to do it before it is cured!
Curing 1
Move the coils to the pre-heated oven and cure at 120 degrees C for a minimum of four hours. Place the coil such that the resin falls down the windings under gravity onto one of the side cheek insulations. This will produce a fillet of resin in one of the most potentially weak areas from an electrical insulation point of view.
Hot Testing: Remove the coil from the oven and clean up the ends of the wire connections. Then test for a spark. Move the roving probe around the coil to check for any electrical leakage. The temperature of the coil during this test will have dropped from the original oven temperature of 120 degrees C but it will still be considerably higher than any temperature it is likely to see in normal service. If the coil sparks reliably at this temperature, we're happy!
Curing 2
Brush a layer of resin over the outside of the windings. then place back into the oven but this time place it the other way up. The resin will again fall under gravity and produce another fillet of resin, this time on the other side cheek insulation. Cure at 120 degrees C for another four hours.
Cleaning up
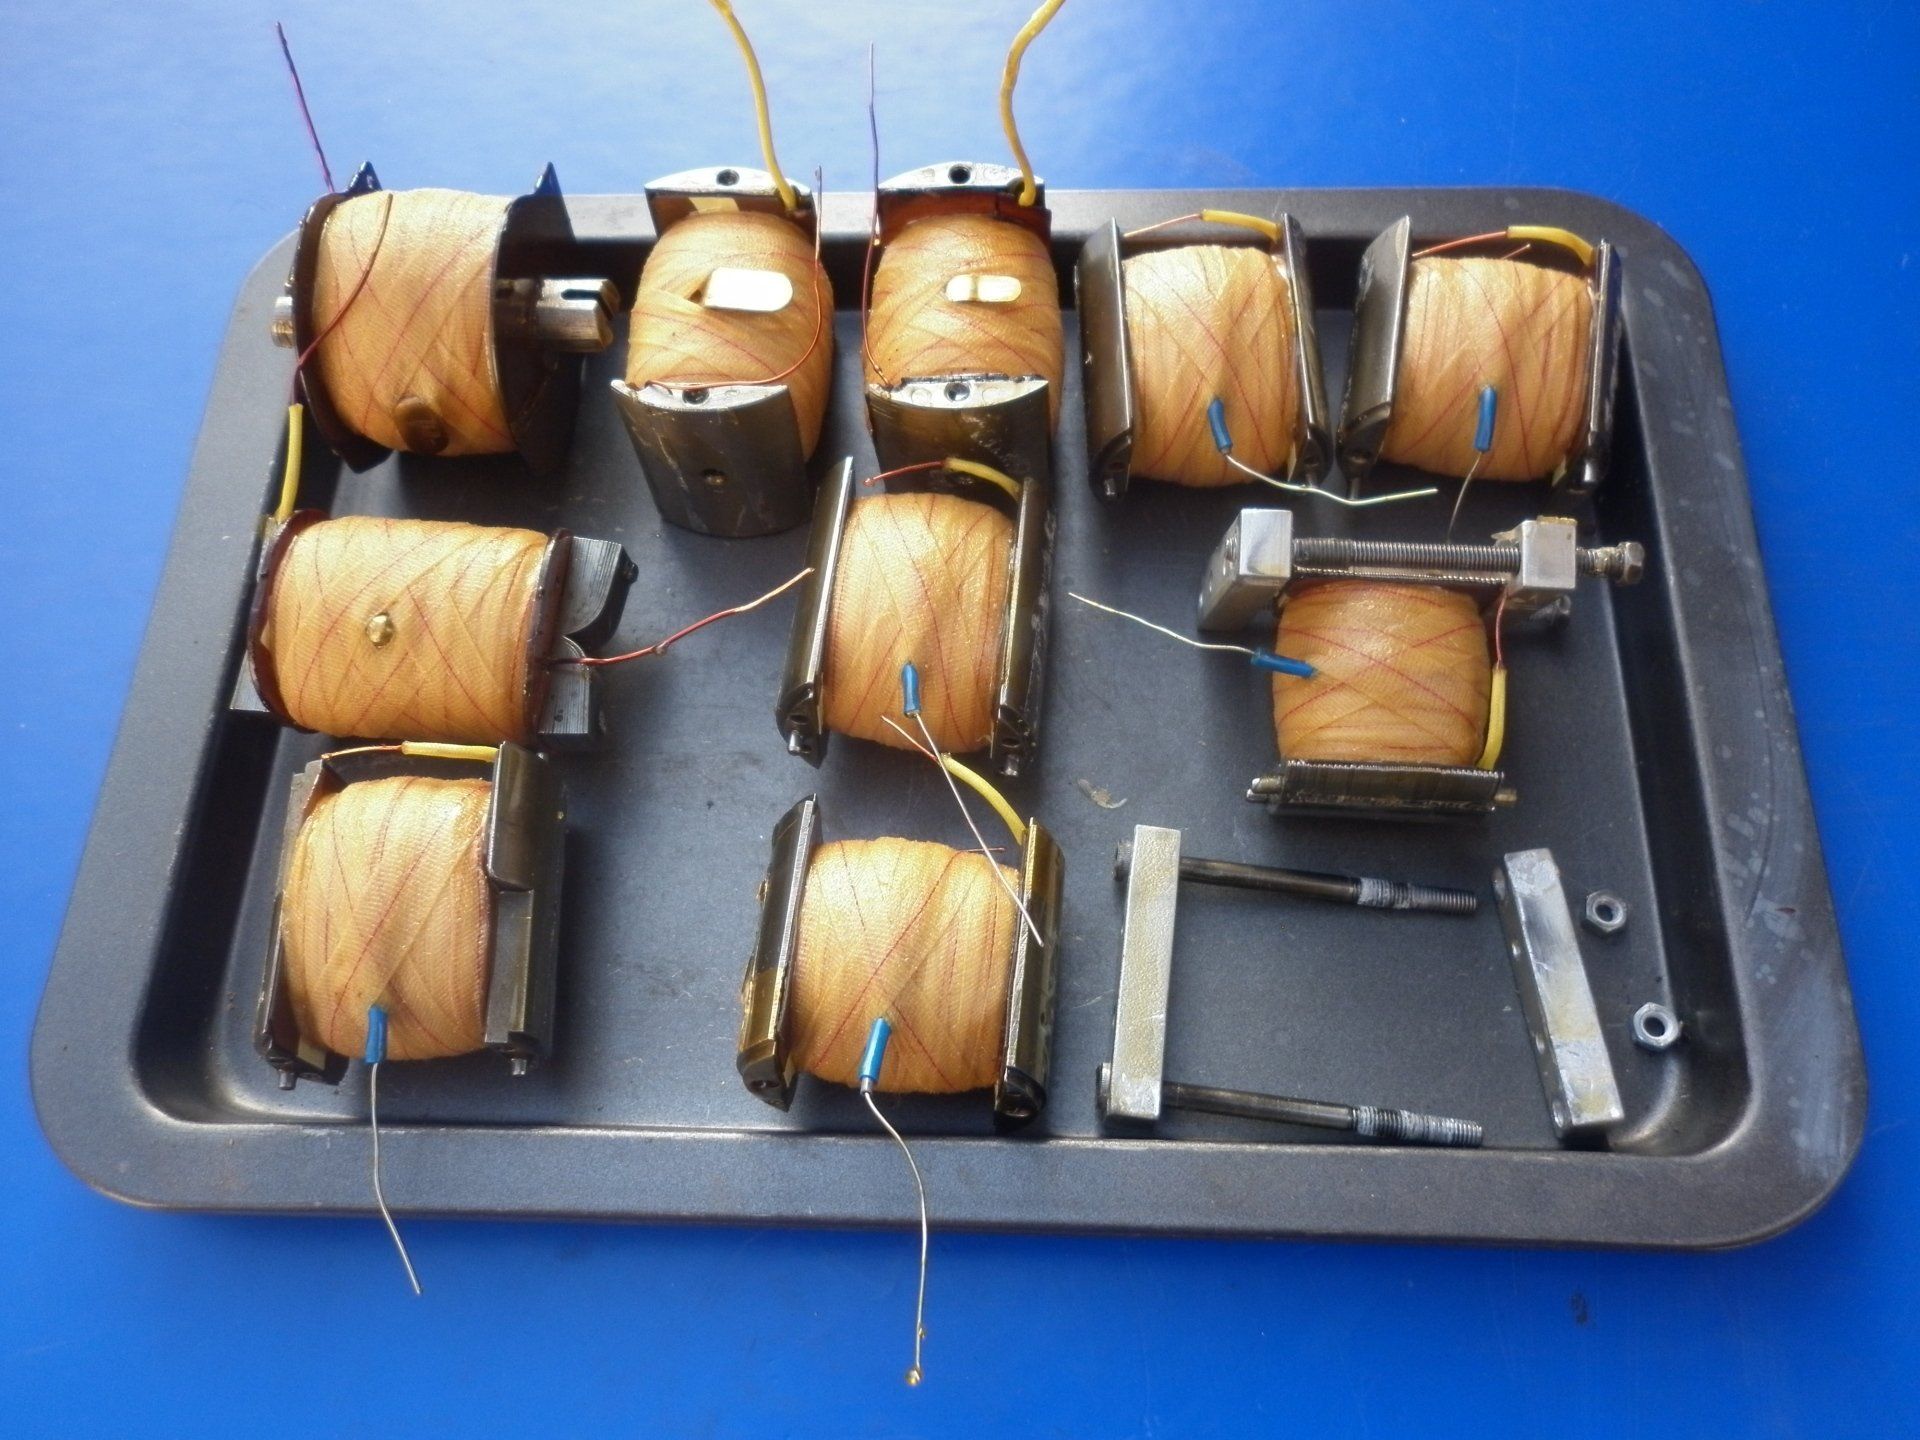
The VPI process ensures that the resin fills every 'nook and cranny'. Unfortunately this will include some areas where it is not wanted. Cleaning up the metal sides on the wire brush is easy enough. Drill out the holes used by the bolts and screws used to assemble the armature. Some of the armatures will have threaded holes for the screws. These will need to be drilled out tapping size and tapped to clean out the threads. Most armatures use locating dowels. If they stayed on the brass end on disassembly, there will be another hole to be cleaned out. If a dowel stayed in the armature core on disassembly, pay particular attention to the areas around the dowel. Any cured resin left here will prevent the ends seating properly and the armature will be out of true as a result.
This all takes quite some time but the good news is that most of the time the process can be left alone to get on with it and your time can be devoted to something else. Use a countdown timer on a mobile phone as a reminder to indicate when a particular stage finishes. We often leave one of the stages to proceed overnight - extended time but it doesn't matter. Sometimes we leave the oven timer to switch off the oven when a curing stage is finished.
The alternative method to VPI is the traditional 'dip and bake process' which is still used by some. It is certainly a much quicker process but, in our opinion, this method has a number of failings:
- The varnish does not penetrate into the windings themselves. This leaves the windings free to vibrate and move around under centrifugal forces eventually leading to a wire breakage.
- Relying on the insulation layers on their own may not be enough to prevent an electrical leakage.
- The dipping process, particularly if it is repeated several times, builds up a thick layer of varnish around the outside of the coil which acts as a heat barrier. Temperature does increase within a coil when in use so anything preventing heat dissipation will result in a reduction in the coil's usable life.

Consider this - if anyone tells you vacuum/pressure impregnation is not necessary, it might be because they don't have the necessary equipment to be able to do it themselves....